Power Automate is used to automatize actions, it therefore needs to connect to services. Most of them can be accessed using the default connectors without providing any secret or password, but sometimes, you need to operate the authentication yourself. The most common example would be calling Microsoft GraphAPI using the HTTP connector. In this case you will have to provide a secret and/or a password to get authenticated to the graph and be able to perform actions. These informations should definitly be secured and should not be hardcoded in the Flow.
Microsoft Azure Key Vault is the perfect place to store your secure credentials, Power Automate has a native connector to securely access these informations.
Prerequisites
To use Azure Key Vault, you’ll need an Azure Subscription attached to your Office 365 tenant. If you need to create the Key Vault yourself, you’ll need to have enough permissions to perform the operation either on the Azure subscription itself or in a specific resource group. The Key Vault can (and in a large organization following ITIL practices, shoud) be created and configured by another person/department, having the appropriate permissions, and your accounts running the Flow in Power Automate will be granted an access to the Key Vault.
Like all Azure connectors, the Azure Key Vault connector is a Premium one. That means that every account running the Flow will need at least a per user premium plan in Power Automate. In most of cases, using secrets and/or passwords is needed when using the HTTP connector or some other premium connector, so the per user plan should be a global requirement for your Flow.
Create and configure the Azure Key Vault
We will now create a Key Vault and add a secret into it.
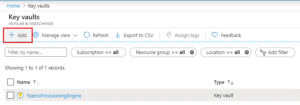
- Go to your Azure Key Vault portal and clic on + Add
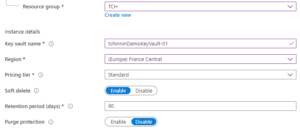
- Fill-in your Key Vault basic infos (as I’m not a specialist of AKV, I will leave here the default parameters)
- Set your Key Vault Access Policy : The accounts that need to access the secret in the Key Vault need to have at least a GET permission on the secrets of the Key Vault. Remember, these accounts will need a premium Power Automate licence to use the Azure Key Vault connector.
Once the Key Vault is created, you can add a secret :
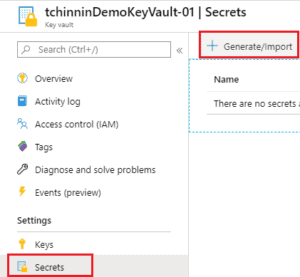
- Clic on the Generate/Import button on the Secrets page.
- Fill-in a secret name and add your secret value. We can see that a secret can be disabled, and we have the ability to set an activation/expiration date. So Azure Key Vault is also a huge opportunity for you to manage your secrets life cycle.

To update a secret, you’ll have to create a new version of the secret :

Use your secret in Power Automate
For the example, I’ll use the secret to call the GraphAPI to perform a GET request. So I’m using an Azure AD App Registration with application permissions on GraphAPI. This Azure AD App Registration has its secret store in Azure Key Vault.
- I first set a constant containing the Azure AD Application ID.
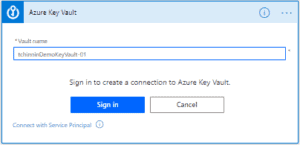
- Then I add a “Get Secret” action from the “Azure Key Vault” connector. One Azure Key Vault connection is linked to only one Azure Key Vault, so if you have several key vault you will need to have several Power Automate connection for the Azure Key Vault connector.
- I specify the secret name I need to retrieve
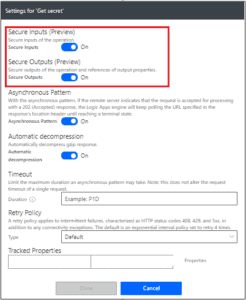
- I set the “Get Secret” action settings to set Inputs and Outputs as “Secure“. That will make the values unreadable in the flow visualization.
- I use the “value” property of the “Get Secret” action as an input for my HTTP request to the Graph API. As this value is set to “Secure” in the action settings, the HTTP request inputs are not going the be readable neither.
About the Author:
Hi ! I’m Théophile Chin-Nin, Microsoft 365 & Power Platform Architect and Microsoft Business Application MVP, from Nantes, France.
Reference:
Chin-Nin, T. (2020). Secure your secrets and passwords in Power Automate with Azure Key Vault. Available at: https://tchinnin.com/power-automate-with-azure-key-vault/[Accessed: 2nd March 2021].
Find more great Power Platform content here.
