Publishing SharePoint site as a template can save you a lot of time if you want to replicate it again in your environment.
Unfortunately if you used a Publishing Site or if you had to activate the Publishing Features in a Collaboration Site, save site as a template will not be available.
In this article I explain all the steps to bring back this feature to the publishing sites and also the extra steps you may need to activate all site features.

Save Site as Template – SharePoint
- Open the site with SharePoint Designer
- In the ribbon go to Site Options
- Locate the option SaveSiteAsTemplateEnabled and modify the value to true
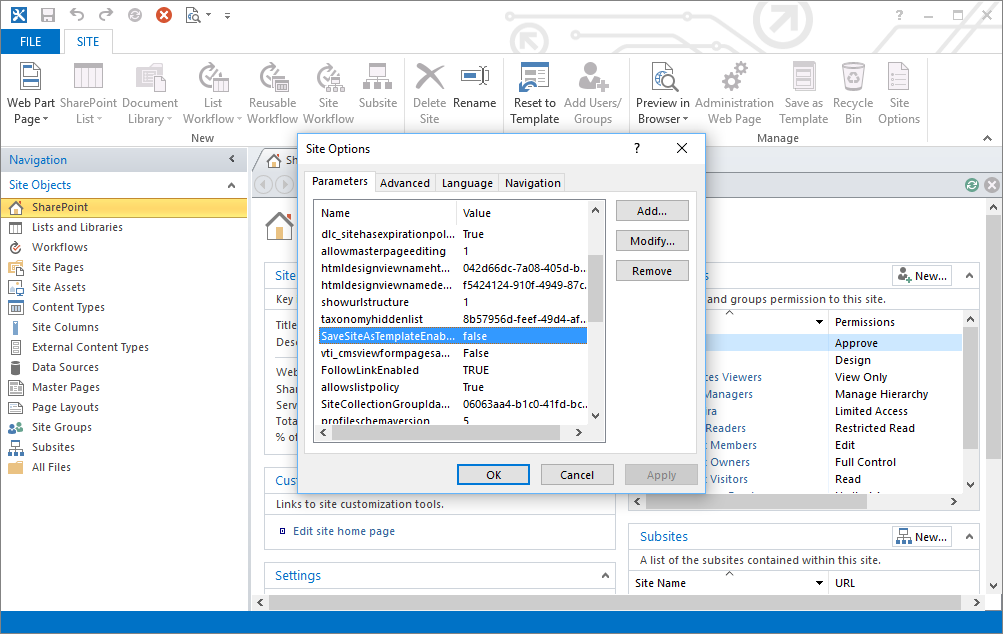
Locate the option SaveSiteAsTemplateEnabled
- Since the site template is disabled in the Publishing sites the option Save Site as Template is not available in the Site Settings you will need to navigate to the page directly: http://yourdomain.sharepoint.com/_layouts/savetmpl.aspx
- Provide all the details and click OK after a couple of minutes you will have the WSP site template generated
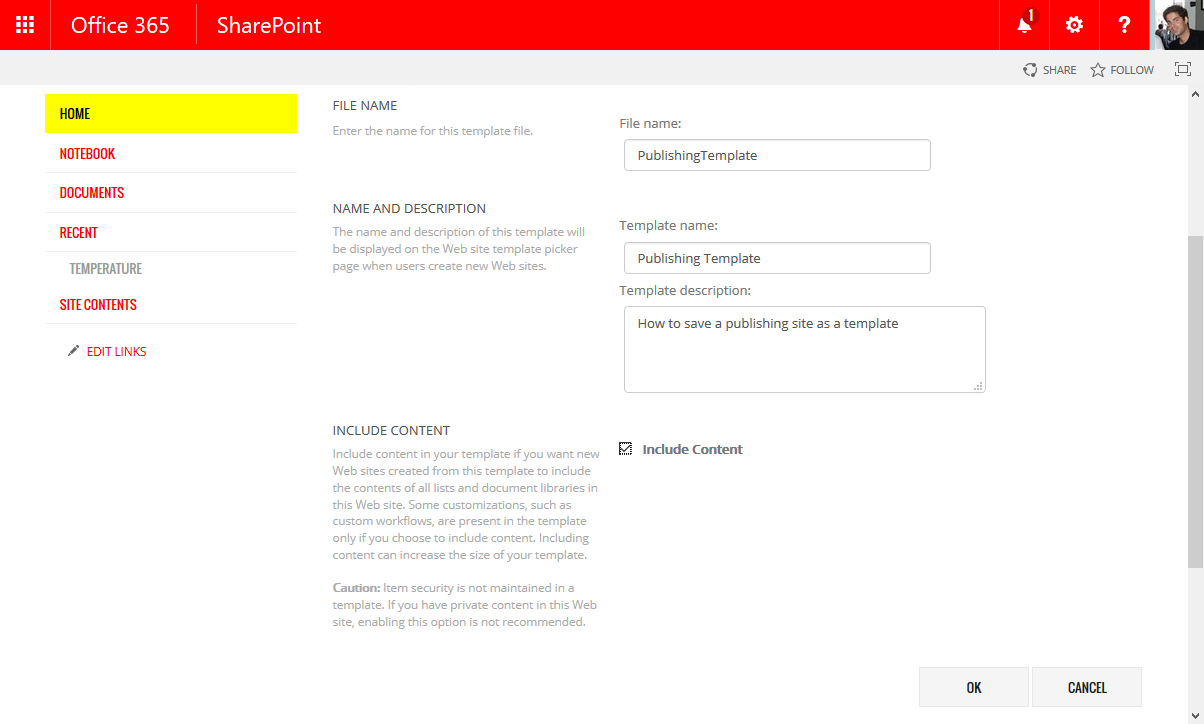
WSP site template generated
If the operation succeeds you will see the screen bellow
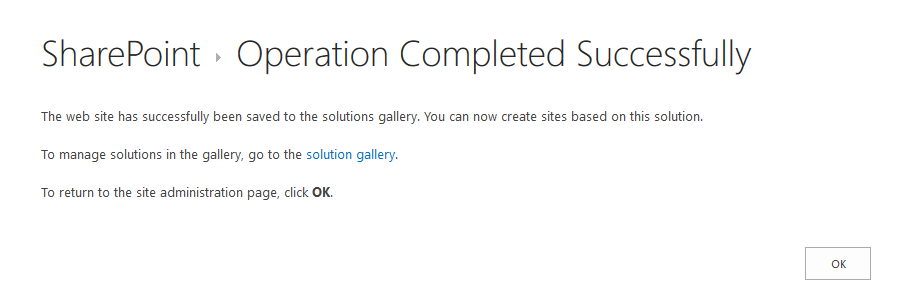
WSP site template generated Successfully
Note: If you have apps downloaded from the store they could prevent you to save the site as a template if you are facing this scenario you will need to uninstall the apps first.
- Open the Solution Gallery and click in the template name to download the wsp file containing the site template
Create a site based on the new template
- Open the site collection where you want to install the site template. If you have other sandbox solutions installed in the original site collection you will need to install them first in the new site collection
- Open the Solution Gallery to upload and activate the site template wsp
- Go to Site Contents and create a new subsite
- Provide all the details and select Custom in the Select a Template option
- Select the template name and click Create, it may take a few minutes
If the site creation fails, you will see an error message like this and you will need to activate the missing features.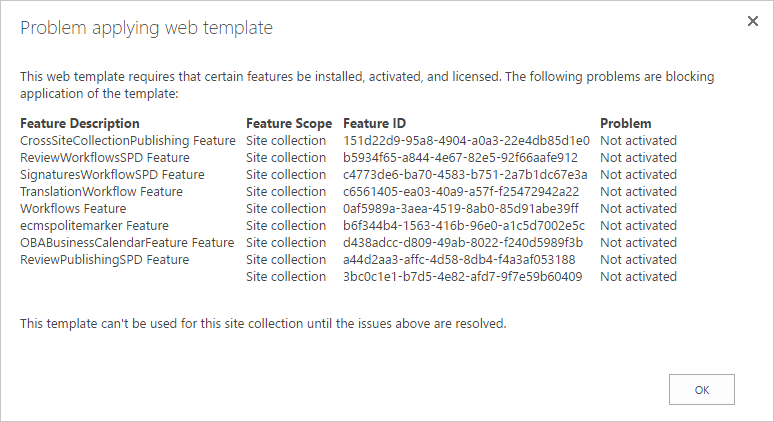
Activate the missing features
Activate missing features
Office 365
You can activate features from SharePoint Online using a PowerShell script, the script and the required dll files can be downloaded from here.
- Extract the files from the zip
- Edit the PS1 file
- Modify the variables to connect to your SharePoint
$sUserName: User Name to connect to the SharePoint Online Site Collection
$sPassword: Password for the use
$sSiteColUrl: SharePoint Online Site Collection
$sFeatureGuid: GUID of the feature to be enabled - Run the script
- After all features have been activated you will be able to create your custom site
SharePoint 2013 and SharePoint 2016
- On the SharePoint server open the command line as Administrator
- Type the following command cd C:\Program Files\Common Files\Microsoft Shared\Web Server Extensions\15\BIN”
- Type the following command stsadm -o activatefeature -id -url
Replace the feature-guid by the feature ID, depending of your SharePoint version it can be presented as a correlation ID
Replace the site-collection-url by the site collection url where you want to activate the feature
- After all features have been activated you will be able to create your custom site
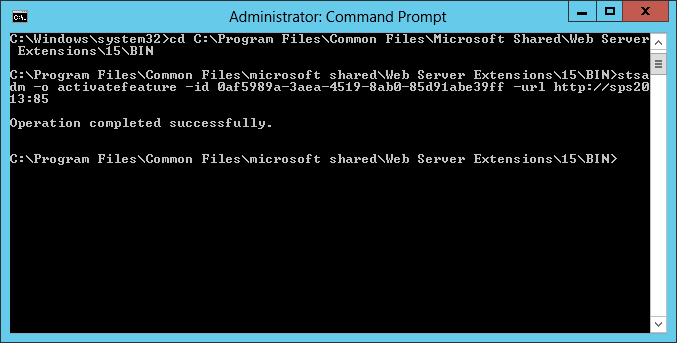
Create your custom site command Prompt
About the author: João Ferreira
Web developer focused on SharePoint branding, blogger, tech enthusiast. Travelling and sports are my addictions, knowledge and success are my daily motivations. Follow João on Twitther

