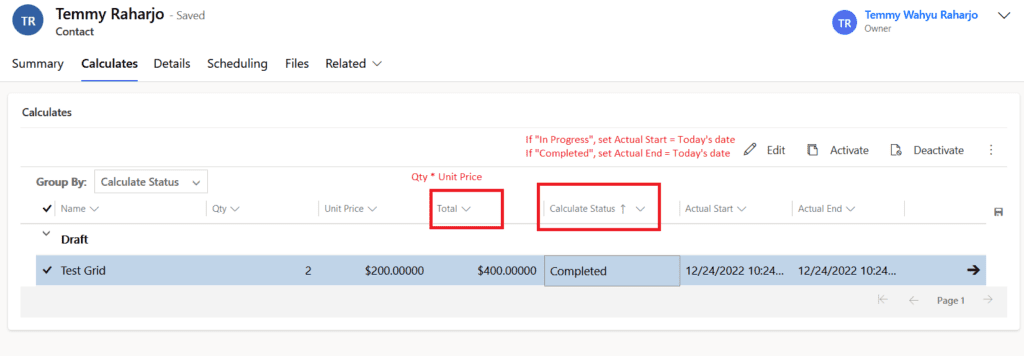
Let’s learn how to implement Editable Grid and apply simple customization. As the name, the Editable Grid is a grid where we can do inline editing. In this blog, I create a custom table where we will implement the below scenario:
– On Qty or Unit Price changed, set Total with formula Qty * Unit Price.
– On Calculate Status changed, if set as “In Progress” then set Actual Start = Today’s date. If set as “Completed”, set Actual End = Today’s date.
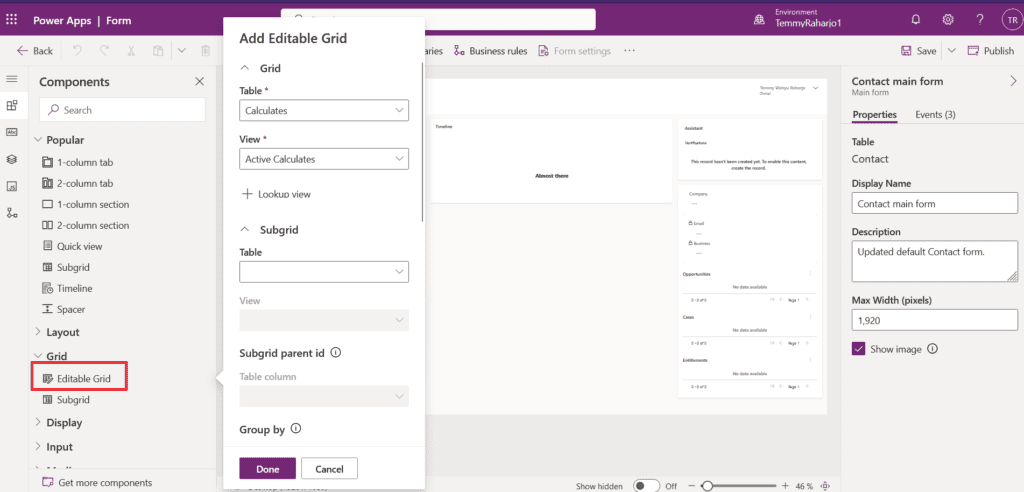
On the Parent Entity (Contact) where we want to place the Editable Grid, add the component > Editable Grid. Then you can set the necessary properties to suit your needs:
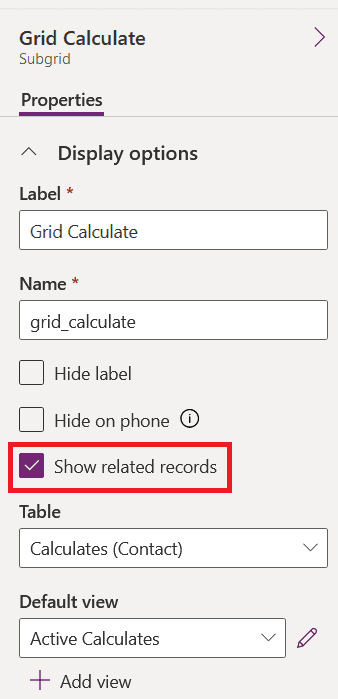
To only allow related records, checked the “Show related records” (don’t forget to set the view with the columns that you need):
For the customization, actually, there is no particular difference with the one that we are using. Here is the code that we want to apply:
vargrid = grid || {};(function() { varcalculateTotal = function(executionContext) { varformContext = executionContext.getFormContext(); varqty = formContext.getAttribute('ins_qty').getValue(); varpricePerUnit = formContext.getAttribute('ins_unitprice').getValue(); vartotal = qty * pricePerUnit; formContext.getAttribute('ins_total').setValue(total); }; this.onPriceChange = function(executionContext) { calculateTotal(executionContext); }; this.onQtyChange = function(executionContext) { calculateTotal(executionContext); }; varcalculateStatus = { 'InProgress': 826540001, 'Completed': 826540002 }; this.statusOnChange = function(executionContext){ varformContext = executionContext.getFormContext(); varstatus = formContext.getAttribute('ins_calculatestatus').getValue(); if(status === calculateStatus.InProgress){ formContext.getAttribute('ins_actualstart').setValue(newDate()); } if(status === calculateStatus.Completed){ formContext.getAttribute('ins_actualend').setValue(newDate()); } };}).apply(grid);
Once you load the above file and create the WebResource in the CRM (Dataverse), you can open the form where you already set the Editable Grid, then add the necessary events (unfortunately on the make.powerapps.com, we can’t see the events. So I need to go back to Classic UI to add the events):
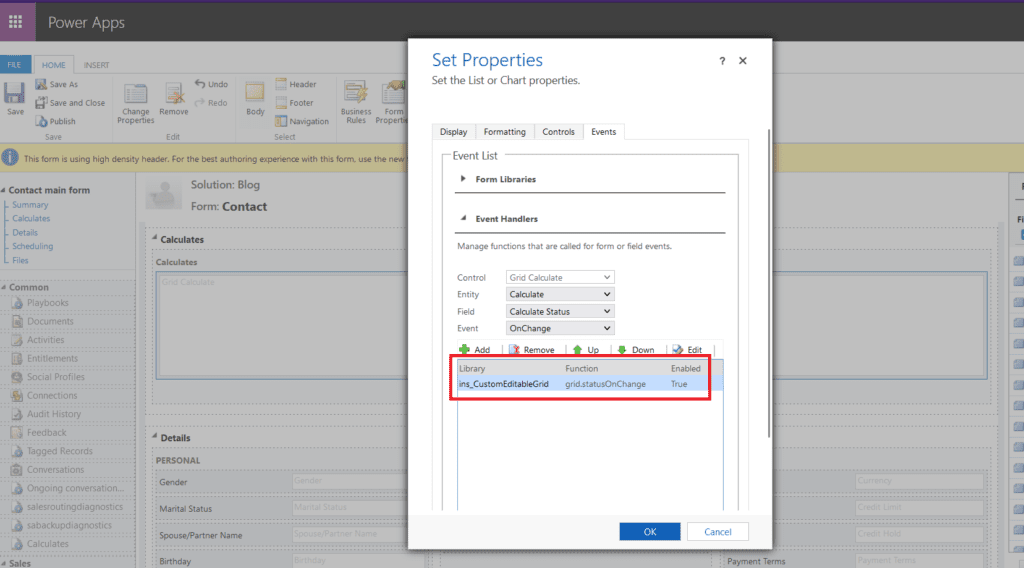
From the above image, as you can see. I add the event OnChange on the Calculate Status. Then we need to set the correct Library and the JavaScript function that we want to call (in this case, I call “grid.statusOnChange“).
And last, here is the demo:
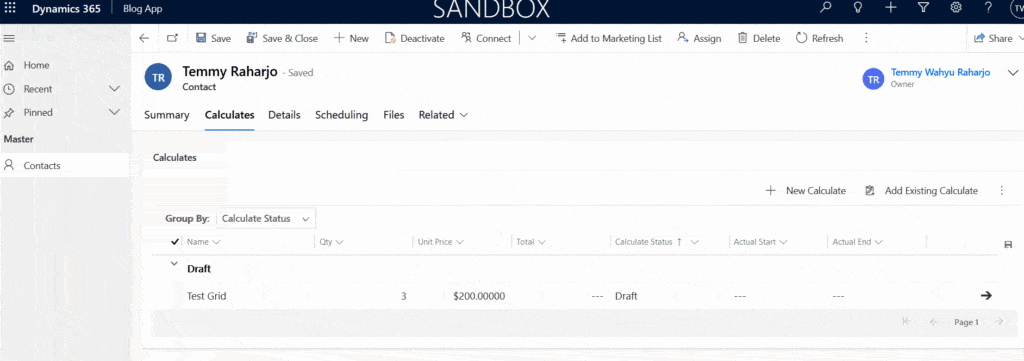
This blog is part of Power Platform Week.
About the Author
Got the Microsoft MVP – Business Applications back in September 2021. Working as a Technical Consultant and hands-on in Dynamics CRM from 2015 – the present. Try to impact the knowledge he gains in the community (you can check Niam.Xrm.Framework – Dataverse Plugin Framework and Niam.Xrm.Client – Model Driven Apps XRM Framework). Pro-Developer that strongly loves Test Driven Development mindset and believes 100% in the concept. Try to implement the “Clean Code” concept and pay Technical Debt all the time (that’s why I create lots of bugs as well).
Reference
Raharjo, T. W., 2022, Model-Driven-Apps: Implement Editable Grid and learn how to customize it, Available at: Model-Driven-Apps: Implement Editable Grid and learn how to customize it – Temmy Wahyu Raharjo (wordpress.com) [Accessed on 18 January 2023]





 Using a SharePoint Online list as a Knowledge source via ACTIONS in Copilot AI Studio
