You can use Azure Database Migration Service to migrate the databases from an on-premises SQL Server instance to Azure SQL Database. In this example, we will move the SQL Server 2008 database on on-premises Windows Server 2008 R2 to Azure SQL.
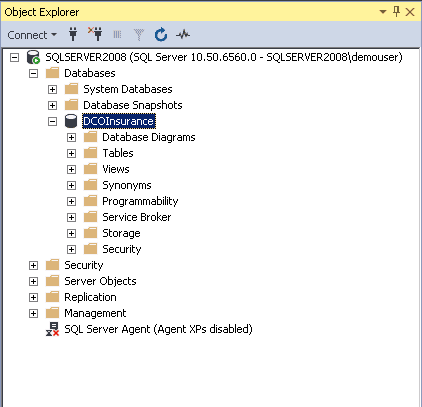
- As seen in the image below, there is a database called “DCOInsurance” on SQL Server 2008. For the demo, I installed this SQL Server on a Windows Server 2008 R2 VM on Azure. However, you can use an on-premises database.
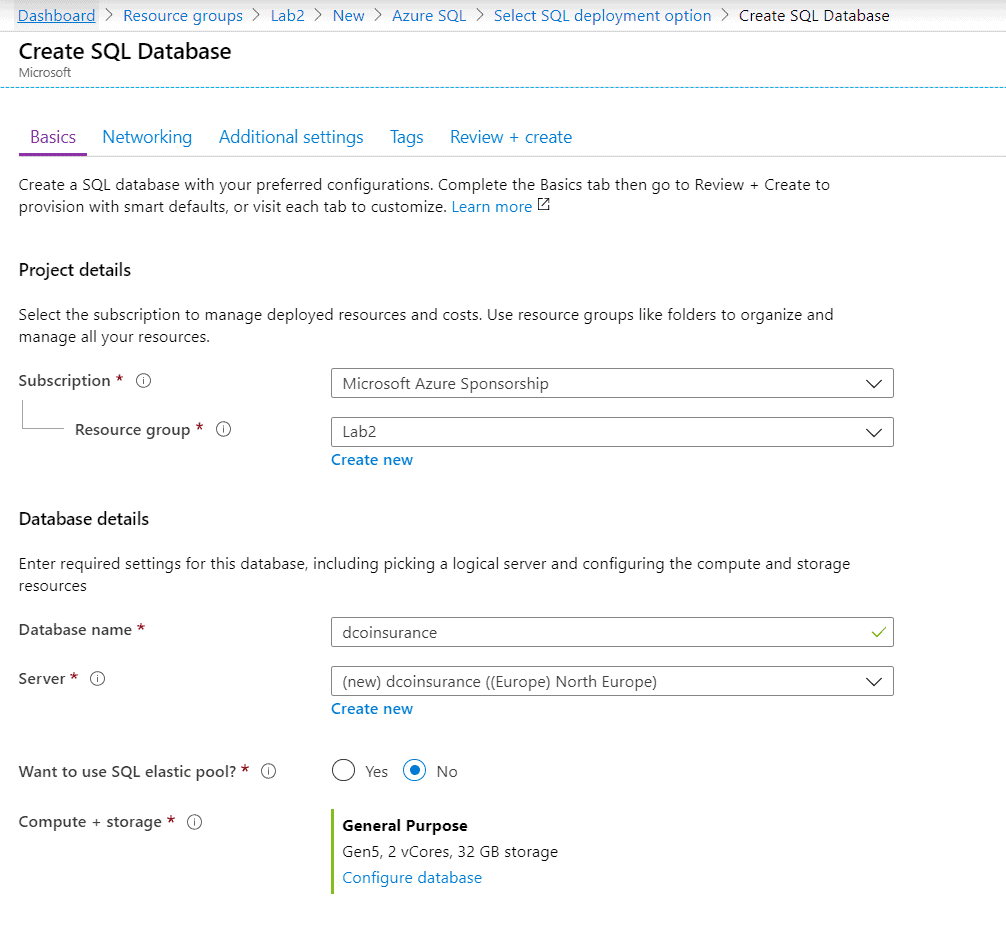
- To move this database onto Azure, we need to create an Azure SQL and database. I created an Azure SQL and database like the image below. You can customize it according to your need.
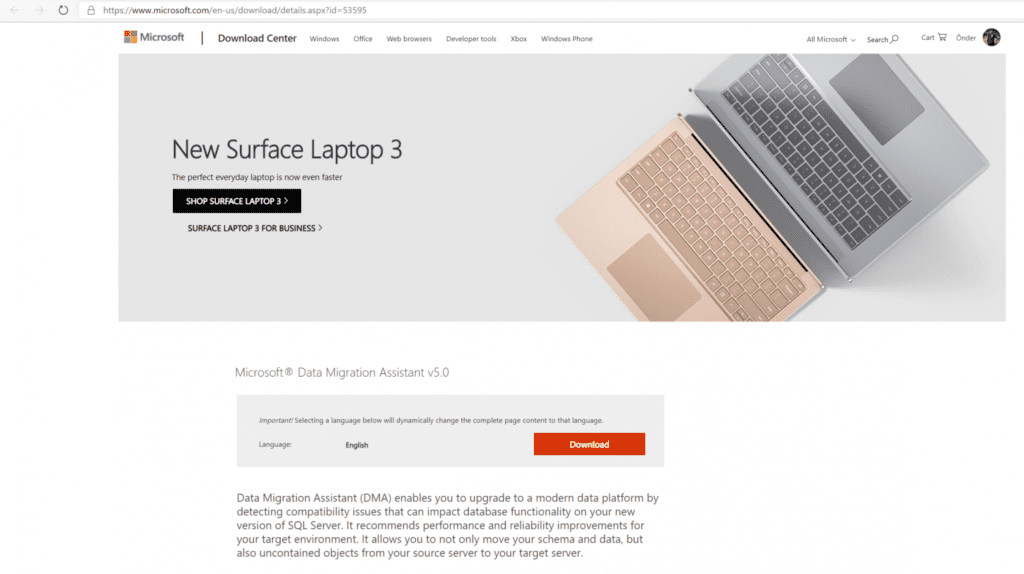
- After that, you need to download Microsoft Data Migration Assistant from https://www.microsoft.com/en-us/download/details.aspx?id=53595 and install it on the server where on-prmeises is SQL Server.
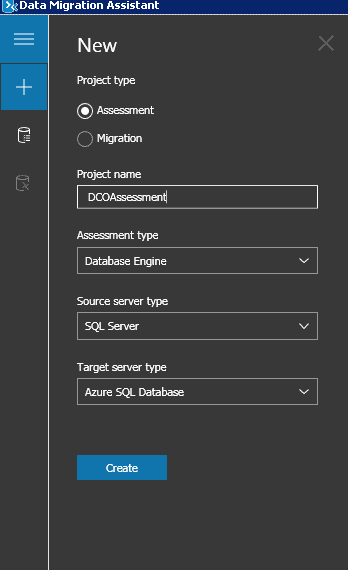
- After the installation is complete, let’s run the Data Migration Assistant. After running the Data Migration Assistant, we first do Assessment. To do this, we select the Assessment as Project type by pressing the + button and set a Project name.
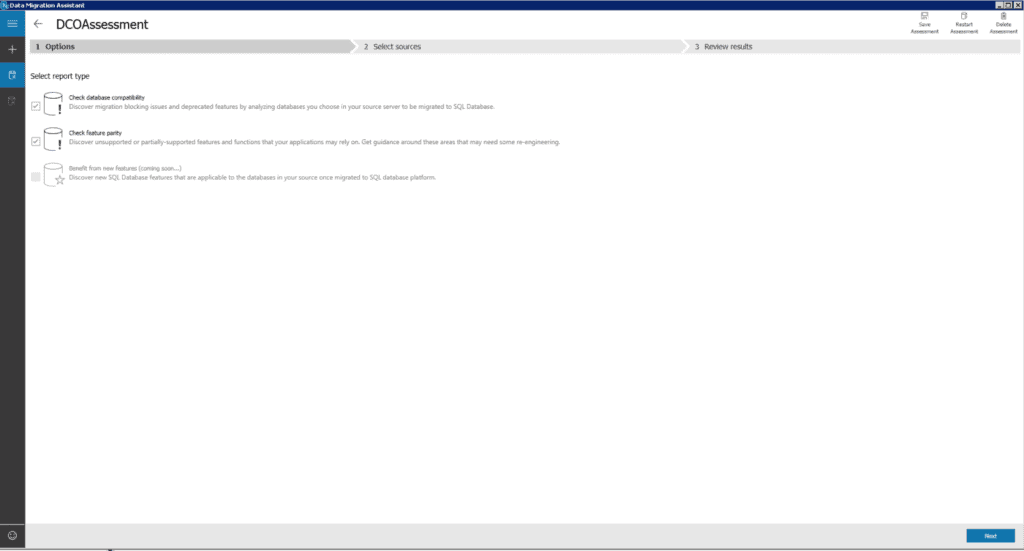
- On the Options screen, ensure Check database compatibility and Check feature parity are both checked, and then select Next.
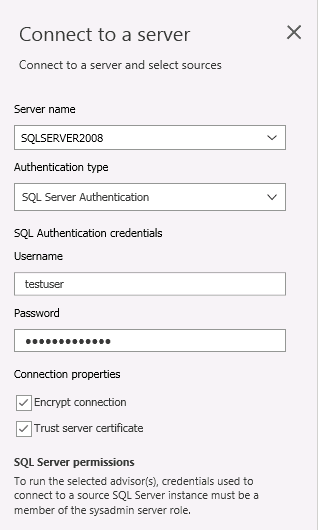
- On the Sources screen, enter the required information in the Connect to server dialog box on the right and press the Connect button.
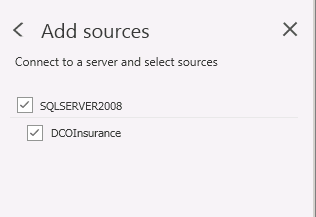
- On the Add sources dialog that appears next, check the box for “
Database"and select Add.
- Select Start Assessment.

- As in the image below, you may receive a warning that the SQL Server feature parity report, Analysis Services, and SQL Server Reporting Services are not supported. However, it shows that these do not affect any objects in your database, so they will not prevent migration.
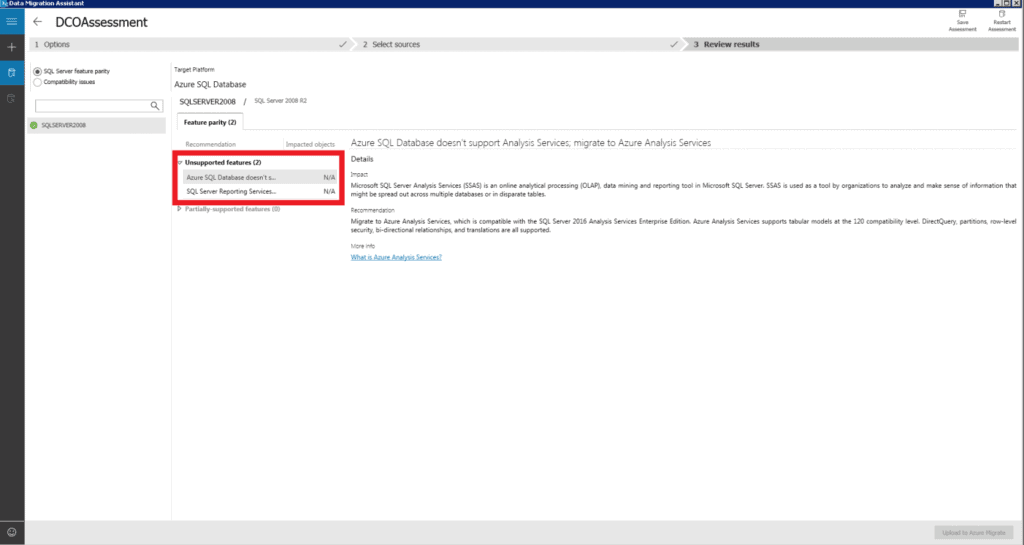
- Select Compatibility issues so you can review that report as well.
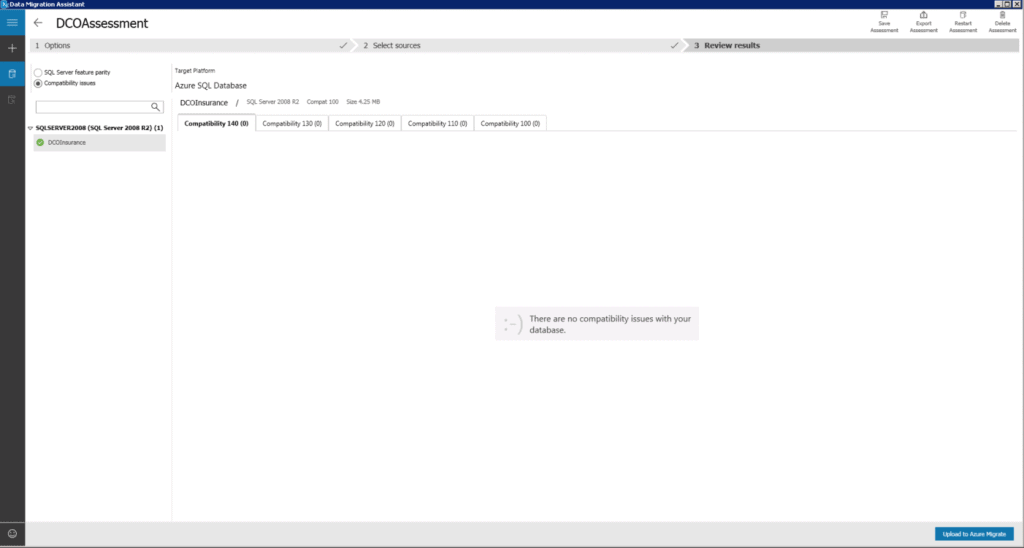
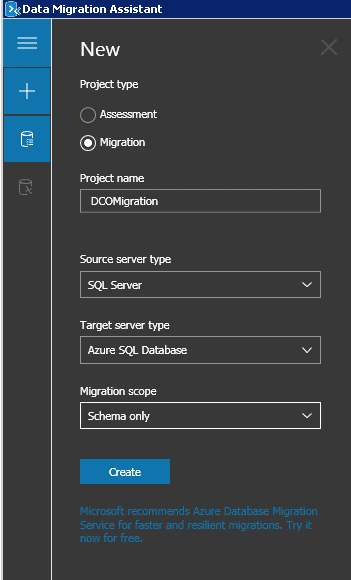
- After reviewing the assessment results and making the database a candidate for migration to Azure SQL Database, you can use the Data Migration Assistant to migrate the schema to Azure SQL Database. To do this, we select the Migration as Project type by pressing the + button and set a Project name.
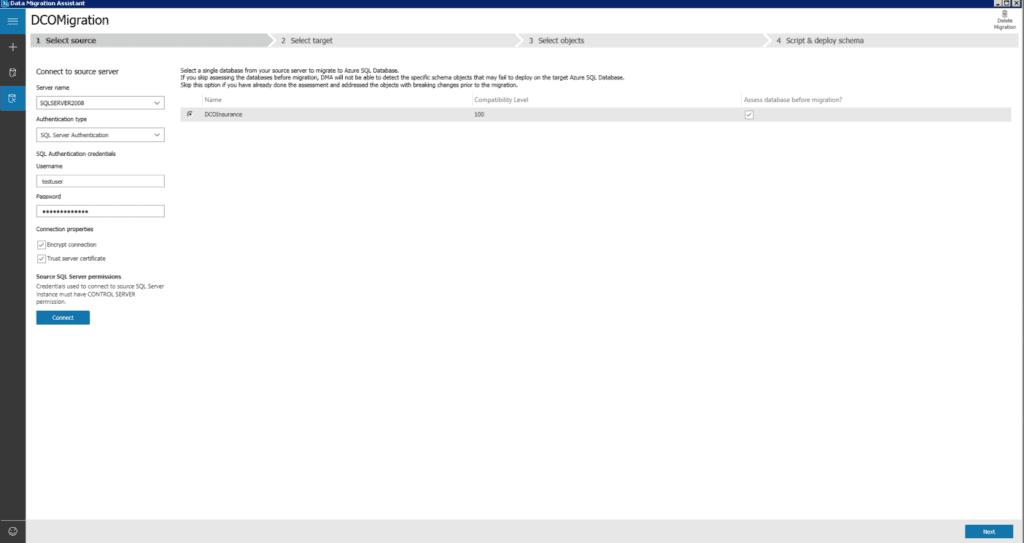
- On the Sources Server screen, enter the required information in the Connect to server dialog box and press the Connect button.
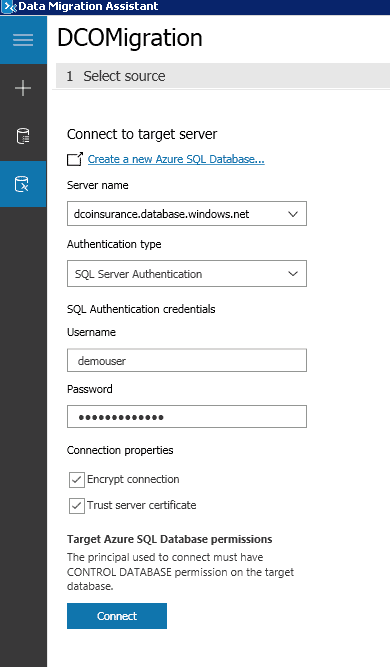
- After clicking the Next button, we need to enter the target database information (Azure SQL information). In the Azure portal, select the resource group where Azure SQL is located . Then go to your SQL database resource. On the Overview blade of your SQL database, copy the Server name.

- Return to DMA and enter the required information on the target tab. Select Next.
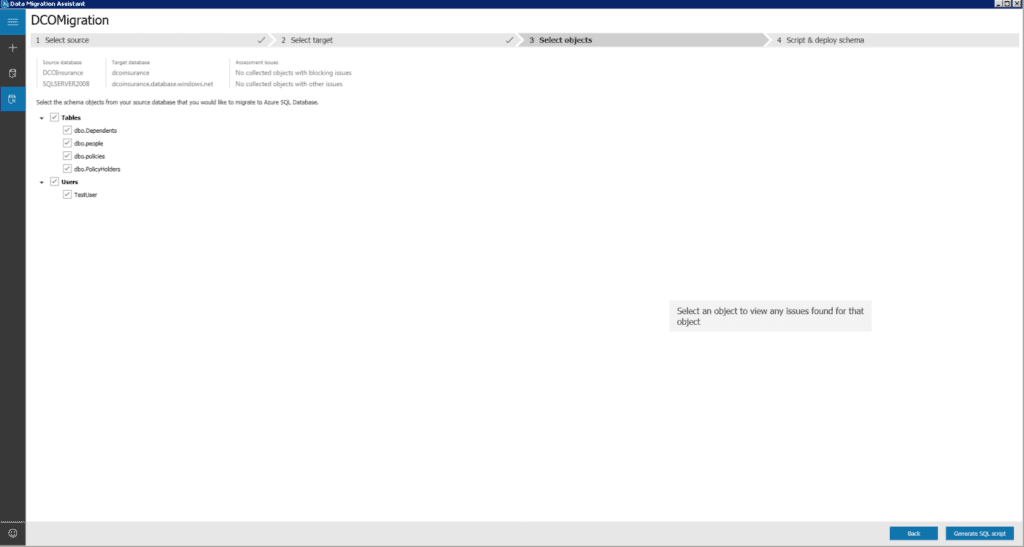
- On the Select objects tab, leave all the objects checked, and select Generate SQL script.
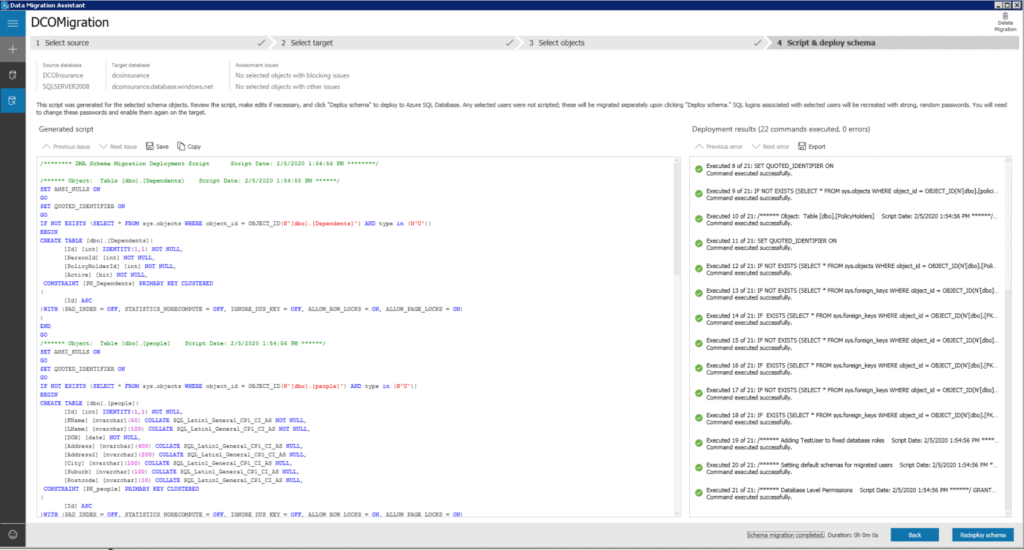
- After creating SQL Script, press the Deploy schema button. After the schema is deployed, review the deployment results, and ensure there were no errors.
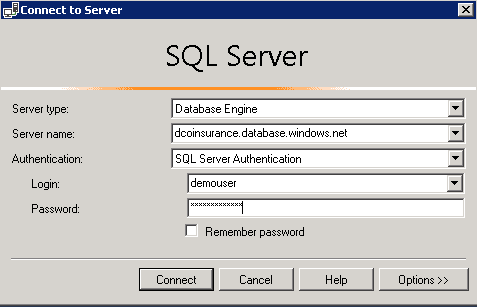
- Next, open SQL Server Management Studio on the on-premises SQL Server, and connect to your Azure SQL Database. However, before connecting, make sure that the Public IP you will connect to is defined on Azure SQL Firewall.
- Once connected, expand Databases, and expand your database, then expand Tables, and observe the schema has been created.
- At this point, we migrated the database schema using DMA. Now, we can migrate the data in our database to the new Azure SQL Database using the Azure Database Migration Service. For this, we create an Azure Data Migration Service on Azure.
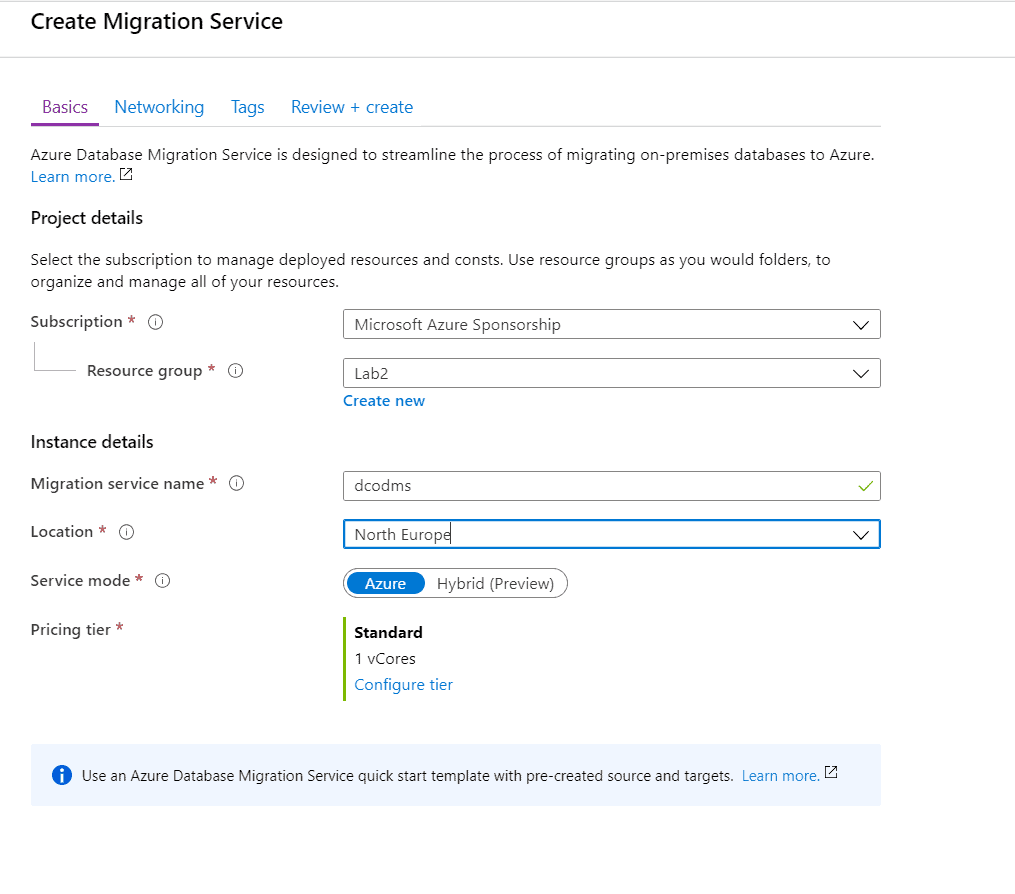
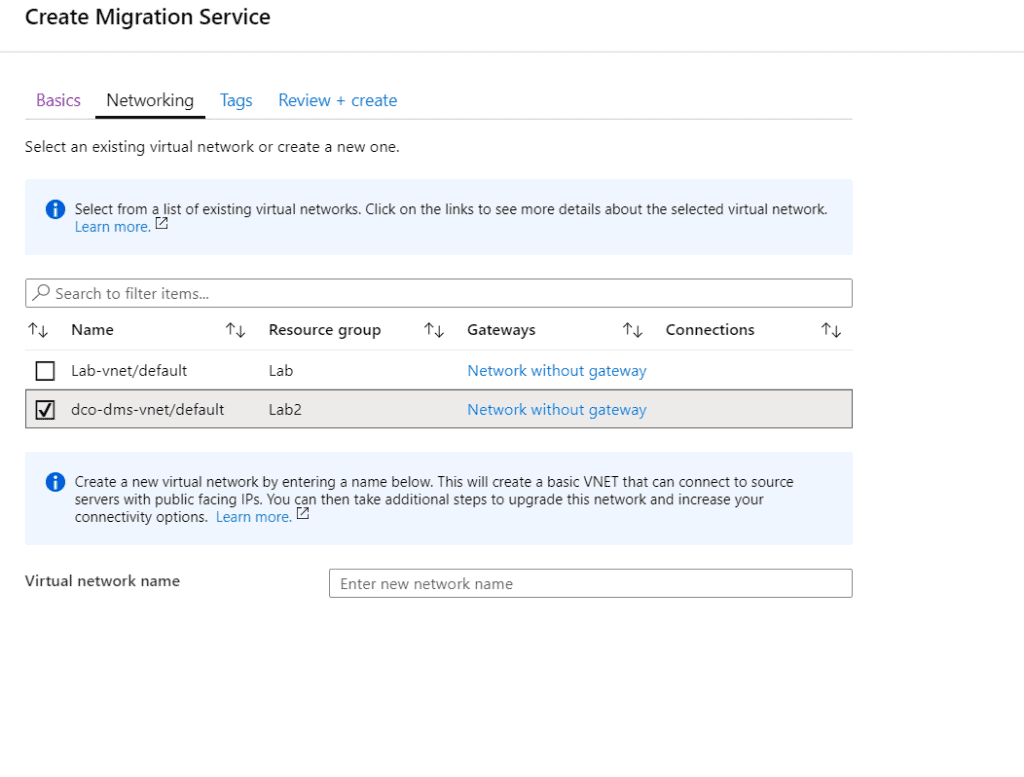
- Azure Data Migration Service needs to be connected to a VNET to access source and target environments. For this, you can select an existing VNET or create a new one.
- After a few minutes, your Azure Database Migration service instance will be created and ready for use. After the process is complete, click on Azure Database Migration Service and press the + New Migration Project button.

- On the New migration project blade , enter the required information.

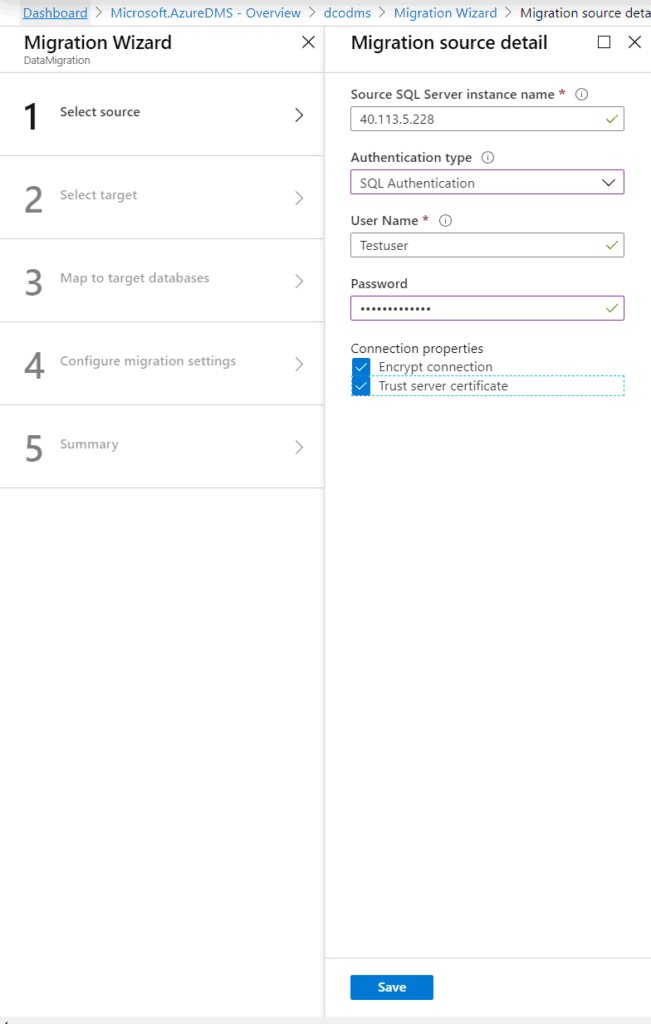
- On the Migration Wizard Select source blade, enter the source required information. (On the Migration source detail screen, specify the connection details for the source SQL Server instance. Make sure to use a Fully Qualified Domain Name (FQDN) for the source SQL Server instance name. You can also use the IP Address for situations in which DNS name resolution isn’t possible. )
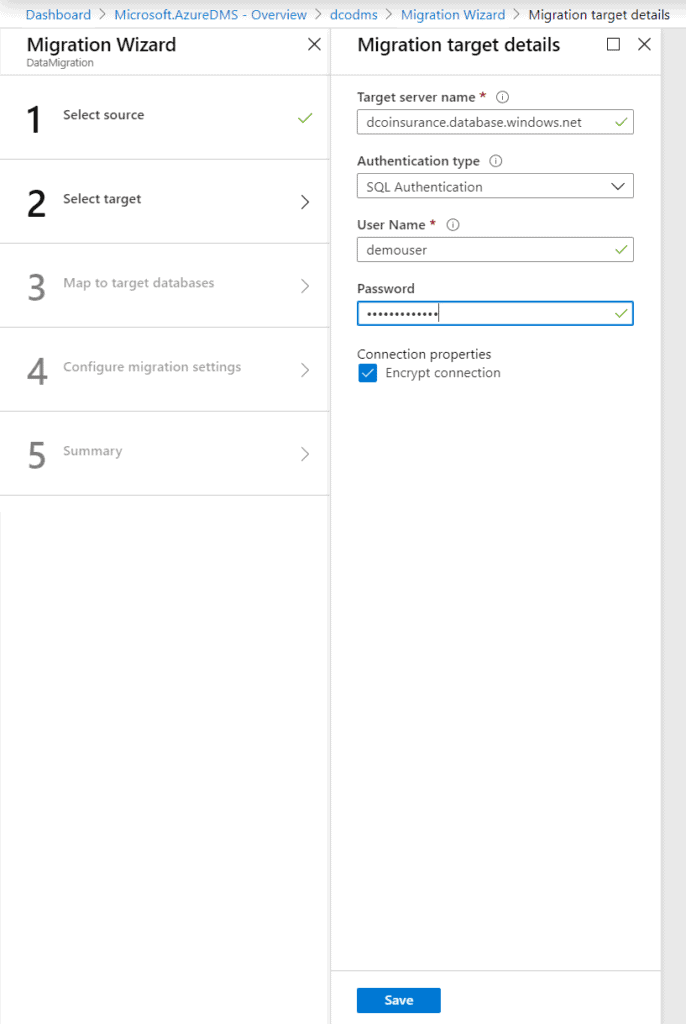
- On the Migration Wizard Select target blade, enter the target required information.
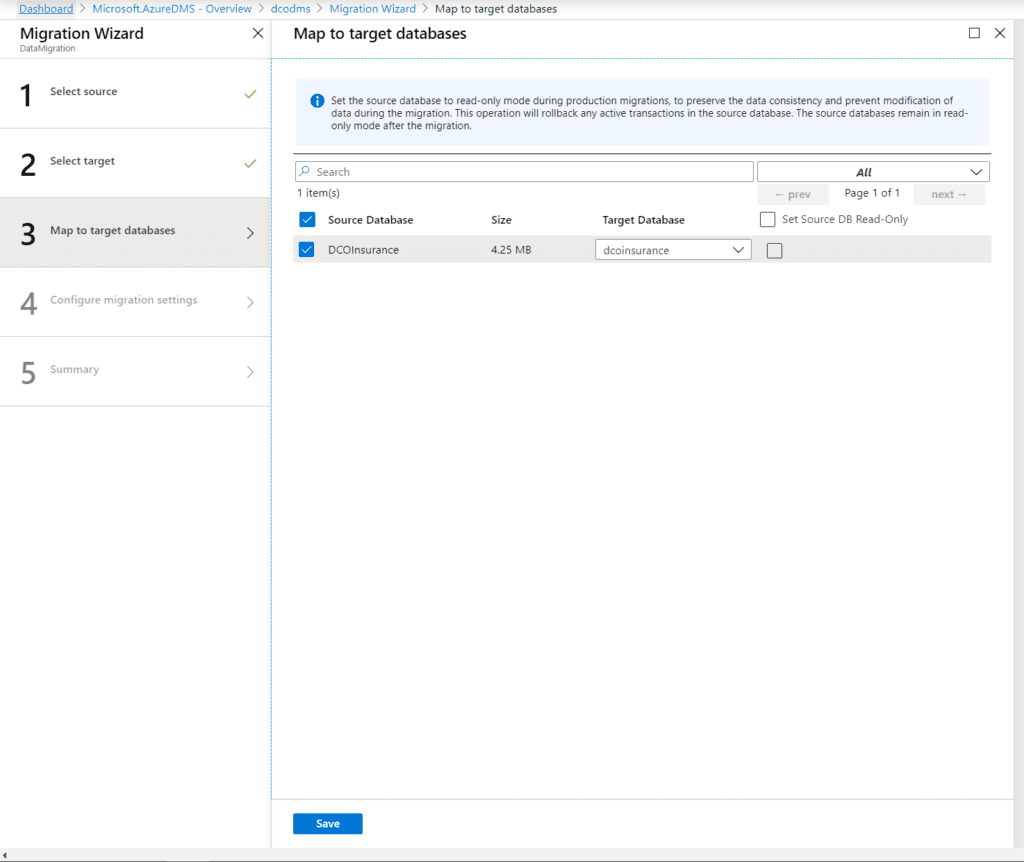
- On the Map to target databases blade, confirm that your databaseis checked as the source database, and that it is also the target database on the same line, then select Save.
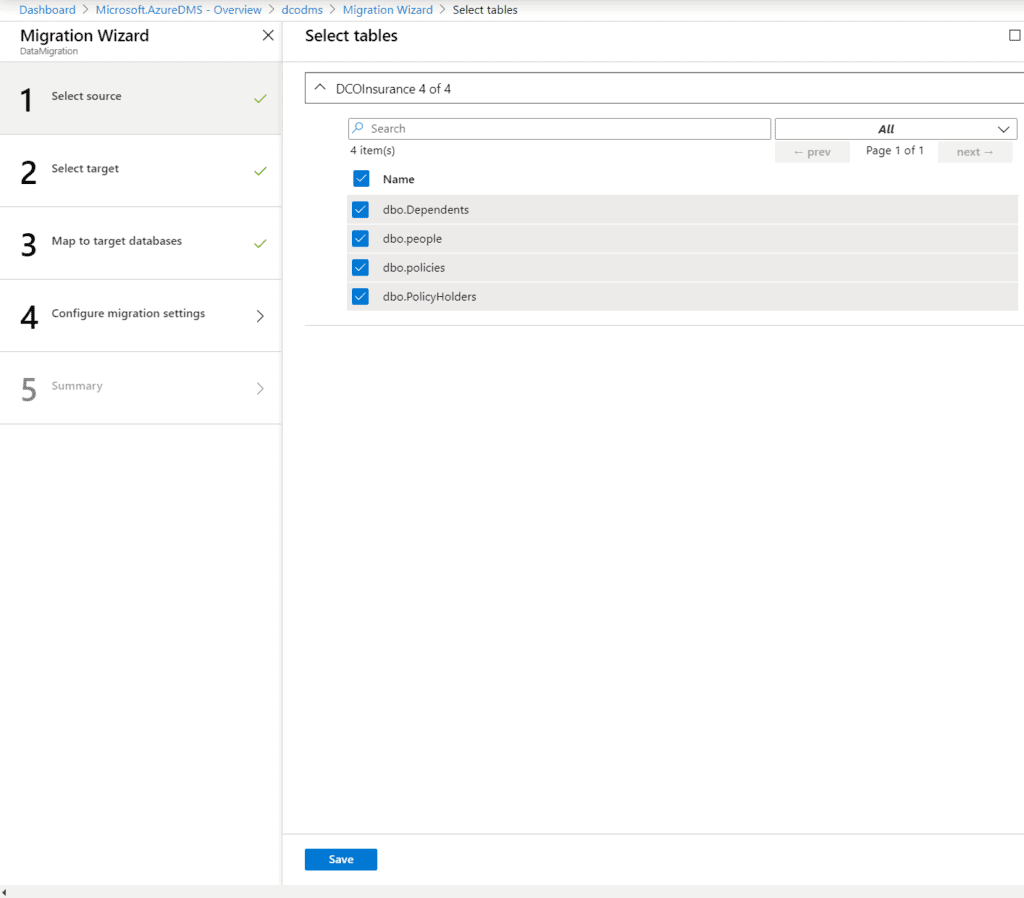
- On the Configure migration settings blade, expand the your database and verify all the tables are selected.
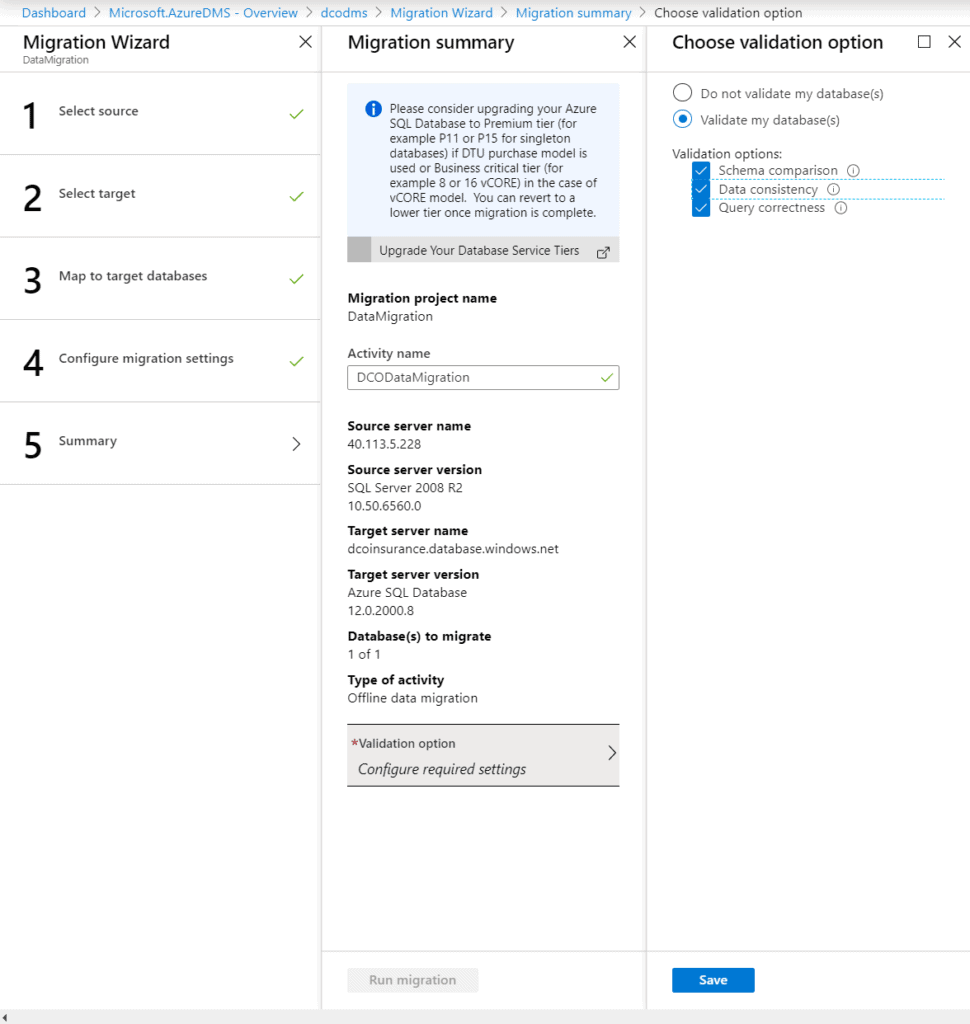
- On the Summary blade, Specify an Activity name. Also select Validate my database (s), check all three Validation options, and then select Save
- Select Run migration after processes are completed. Depending on the size of your database, the migration will be completed after a while.
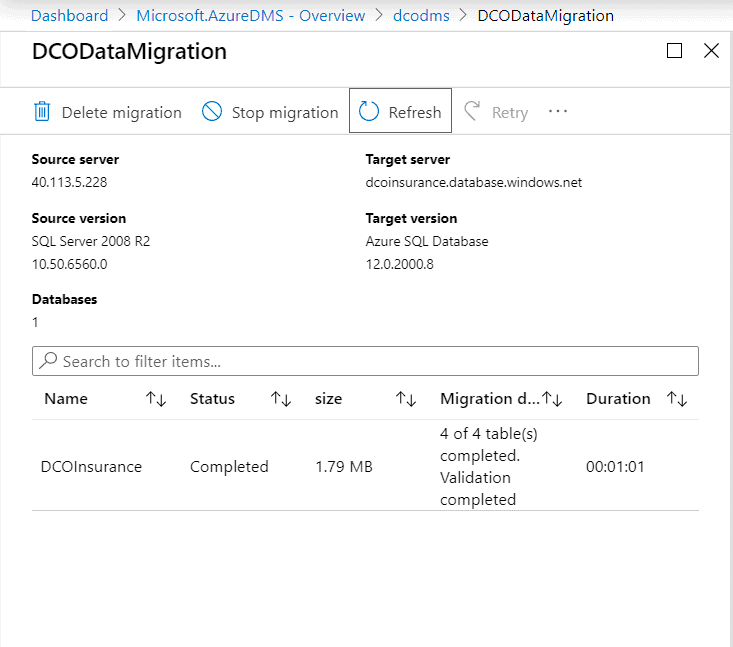
We have successfully installed the on-premises SQL database on Azure SQL.

About the Author:
Önder has been working in IT with more than 15 years of experience specifically in Windows Server, SCCM, SCOM, SCORCH and Cloud Technologies including Microsoft Azure and so on. He’s written more than 300 technical articles published on several communities.
Değer, Ö. (2019). Migrate SQL Server Database to an Azure SQL Database. Available at: https://www.devcloudops.com/2020/02/05/migrate-sql-server-database-to-an-azure-sql-database/ [Accessed: 18th May 2020].
Check out more great Azure content here


 Using a SharePoint Online list as a Knowledge source via ACTIONS in Copilot AI Studio
