Background
Hi and welcome to the third article that describes how to make a PowerApps-based activity feed based on SharePoint search results. If Google’s search algorithm has landed you here for the first time, then I suggest going back to parts 1 and 2 for background and context. What we are building can be seen in the picture below highlighted red..
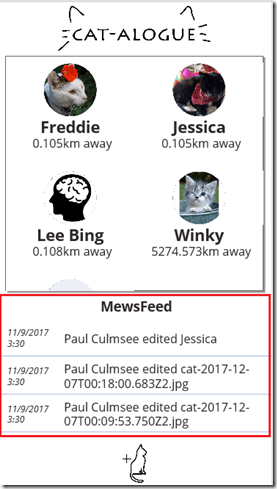
Now there are 5 parts to this solution and in this third post, we are in the home stretch because we have done the first three steps and we are halfway through part 4.
- Setting up SharePoint search
- Querying the search index via a PnP PowerShell script
- Creating the Azure function
- Creating the custom connector
- Testing in PowerApps
I covered parts 1 and 2 in the first post where we created a Result Source in SharePoint and and tested a PowerShell script that uses it to bring back the latest 20 search results. In the second post, we created and tested an azure function, and just deployed our custom connector as shown below:

CATalogue Mewsfeed
Before we rush off to PowerApps to bask in our awesomeness, let’s test our custom connector first. Click the pencil button to edit your freshly minted connector. Using the breadcrumb, navigate to the Test menu.
You will be presented with a Test operation screen and (very likely) a prompt to create a connection. While newbies might find it weird to ask for a connection just after we just made one, it is worth paying close attention to the terminology used. We actually created a custom connector, not a connection. The PowerApps team describe it like this:
Data is stored in a data source, and you bring that data into your app by creating a connection. The connection uses a specific connector to talk to the data source
Therefore, it stands to reason that to test a connector, one has to create a connection. So let’s do that right now by clicking the + New connection button. On the resulting confirmation dialog box, click Create.
Now you will be redirected to the connections screen. This is somewhat counter-intuitive given at first, since we actually wont do anything with the connection from this screen, but if it makes you feel good, feel free to look for a new connection with the same name as your connector as shown below. This means all went to plan…

CATAlog Mewsfeed
Using the left side navigation, head back to the custom connections screen. Edit your connector once again, and navigate back to the Test screen. This time the Test Operation screen will show your new connection listed…

Scroll down and you will see an Operations section. The code query string parameter that we worked with in part 2 is listed.

Note: It should be greyed out and not editable. If it is editable, you have likely forgotten to change the visibility parameter when we created the custom connector in part 2.

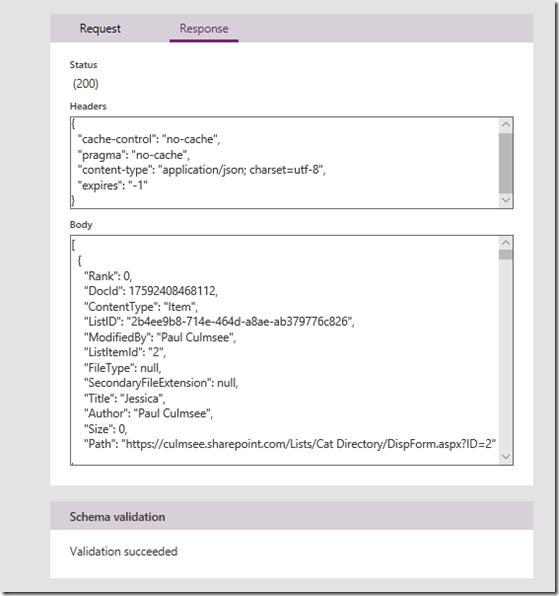
Click the Test operation button to give it a whirl. After a few seconds, you should see a successful response. Looking in the body of the response, you can see the Json search results produced by your Azure function. Yay!!
Part 5 – Testing in PowerApps
Now that we have created a connection and used it to test our custom connector, it is time to move to PowerApps. To keep things simple, lets build an app from scratch to show this working. In PowerApps studio, create a blank phone app and then follow the steps:
1. From the View menu, choose Data sources and click the Add data source from the Data panel. From the list of connections, find the connection we created moments ago to test the connector. Click it and it will be added to the app.


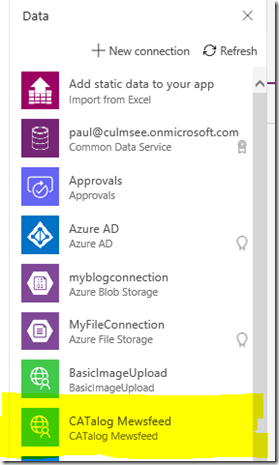
Note the name of your connector matches the Postman collection we created in part 2 of this series. Make a note of this because we will need it momentarily…
2. From the Insert menu, choose Icons and choose the Reload icon.

Choose reload
Select the refresh icon you just created and choose the OnSelect property. Type in “ClearCollect(Feed,” and then enter the name of the data source you just added (mine is called “CATalogue”). The intellisense in PowerApps will also present the name of your function that you specified back in part 2 when creating the postman collection. In my example it was called “GetMewsFeed”.

OnSelect
Note: If you are presented to provide a code as a parameter to your data connection as shown below, you missed an important step in the custom connector setup. Recall in part 2 I mentioned that the code parameter in the custom connector had to be changed from none to internal. For now, you can add the same code that was generated as part of the Azure function URL, otherwise update the custom connector.

GetMewsFeed
3. Click the new icon to trigger a data refresh and then navigate to Collections from the File menu. You should see a collection called Feed with some of the data returned. If you see a table of data then congratulations! You have successfully queried SharePoint search and returned the data to PowerApps via an Azure function.

Feed
The columns that are of interest to us for the purposes of this post are:
- Title
- ListID
- ModifiedBy
- LastModifiedTime
- OriginalPath
So now that we have gotten some data, let’s now show how we can display it in the form of a data feed.
4. From the Insert menu, choose Gallery and pick a Blank flexible height gallery. In the data panel, choose the Feed collection from the Data source dropdown.
5. Ensure your Gallery is still selected via the left side navigation. Click the pencil icon inside the gallery and then from the Insert menu, choose Label. This label will bind to a column in your data source and you should see something like the second screen below, where data is repeated down the page. If the label control is still selected, the Text property will be set to something like ThisItem.Author.

ThisItem. Author
Modify the Text property of the label to “Updated by ” & ThisItem.ModifiedBy & ” on ” & ThisItem.LastModifiedTime. The result is a line that shows who modified the item in the feed and when they modified it. While you are here, rename this label control and call it something more meaningful. In PowerApps I use Hungarian notation as it makes it easier to understand complex formulas later. Thus I called this one lbWhoWhen. Finally, resize the gallery to fit the screen and drop the font size of the label so everything fits on one line…

ibTitle
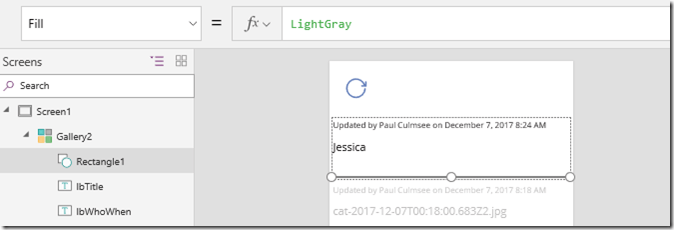
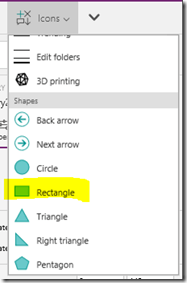
7. Add an icon to the screen and choose Rectangle from the Shapes section. Resize it so that it looks like a horizontal line (Set the Height property to 1) and change its colour to grey either via the toolbar or via setting the Fill property to “LightGray”. Also rename it to something like Separator.
Rectangle 1
Preview the app and the feed should start to take shape…
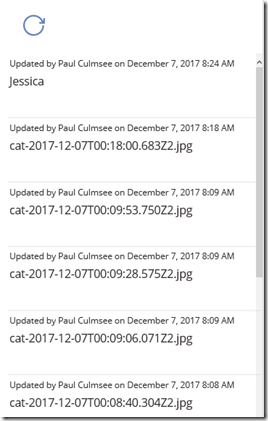
Updating
Hopefully you can see by now that we are more or less done, as we are now moving into aesthetics in terms of how our feed is to look. So I will round out this post by showing you a couple of tricks that I think make this feed more interesting…
6a. Pimping your feed (easy)
If you look closely at the sample data I used to build this feed, it includes images as well as list item content. In fact, to remind you of where we started, I mentioned that my daughter wrote an app called CAT-alogue which used three SharePoint lists/libs: There was a list called Cat Directory, a list called CatImageRegister and a library called CatImages.
So let’s make the following enhancements:
- If the search results contain a Description field, use that instead of the Title field (the Cat Directory list utilises the built-in SharePoint site column called Description, which happens to be a managed property in SharePoint search)
- If the search result is the image library, display the image rather than the file name.
Handling description requires a couple of changes to our Title label. First, we need to set Auto height to On because the description field is multi-line. This is easiest done by toggling it to On via the right-side properties panel when selecting the label as shown below:
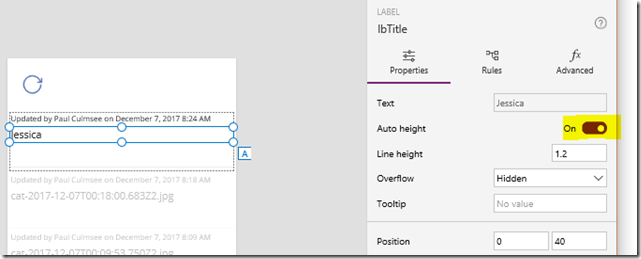
IbTitle
Next, change the Text property in the label to If(IsBlank(ThisItem.Description),ThisItem.Title,ThisItem.Description). This tells PowerApps to display the Title field if no description has been crawled. The effect should be immediate…
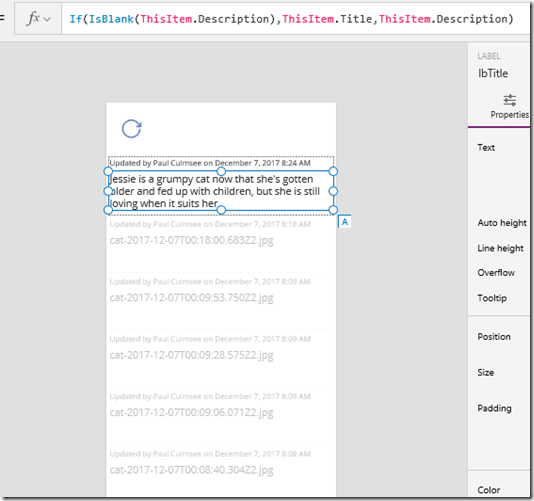
ThisItem
But this is a flexible height gallery, so let’s take advantage of this. We will now set the position of our separator rectangle to be based on the height of the Title/Description label. Remember this label is now set to auto-height… To do this you will need to take note of the name of your Title/Description label. Mine is called lbTitle.
Set the Y property of your rectangle to: lbTitle.Y + lbTitle.Height + 20. Previewing this change should result in a change to your screen for the better…
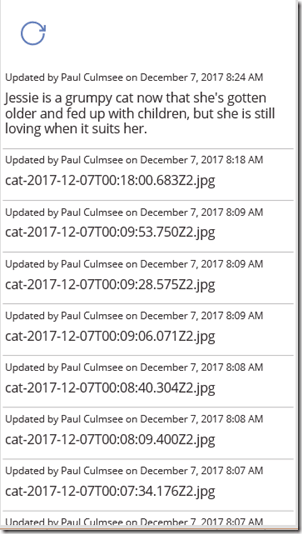
Updating
6b. Pimping your feed (less easy)
Right! So what we can do about displaying images in the feed? Turns out this is one of those examples that might seem easy, but is actually quite tricky and also not particularly bandwidth efficient either. It also has a lot to do with how you set up your data in SharePoint, so some refresher is needed before we start.
First up, Ashlee’s CAT-alogue app is structured with 3 lists. There is a list called Cat Directory, a list called CatImageRegister and a library called CatImages. The second list is the one that matters here, as each time a photo is taken, the metadata is stored in this list rather than the CatImageslibrary. It then links to the actual photo in CatImages as shown below. Note that the title field for CatImageRegister is the name given to the photo in CatImages.

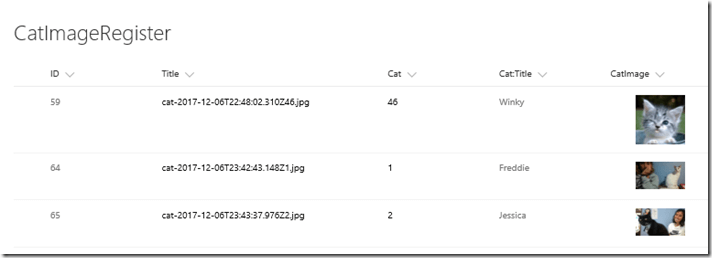
CatImages
Why set it up this way you ask? Well for a start, PowerApps cannot connect to libraries yet, and these days, PowerApps is smart enough to be able to retrieve images from a list like this. So let’s take advantage of this…
Also some more useful nuggets of context: another thing we can take advantage of is the built-in SharePoint search property called ListID. Way back in Part 2 when we did the PowerShell script, I included a line that specified some search managed properties to be returned that are not by default. The line was:
$returnproperties = @(“ContentType”,”ListID”,”ModifiedBy”, “ListItemId”)
Specifically, the property of ListID is what matters here. This property returns the unique ID of each list. Can you see where I am going with this yet?
From the Insert menu, choose Media from the toolbar and insert an Image control into the gallery. Rename it to CatPhoto and resize it and place it under the first label.
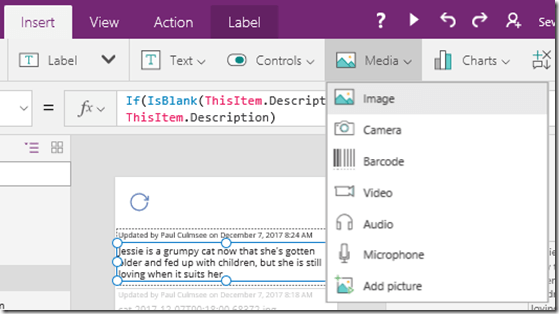
Insert
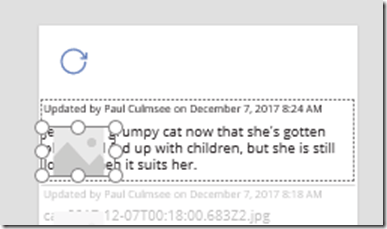
Updating
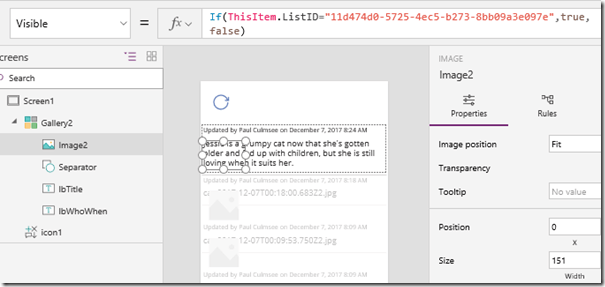
Set the Visible property to only display if the list ID of the feed item is the CatImageRegister list. It will be something like: If(ThisItem.ListID=”11d474d0-5725-4ec5-b273-8bb09a3e097e”,true,false). Of course the ID you need to specify depends on our setup. This should now hide the image control when the ListID does not match my CatImageRegister list.
Visible
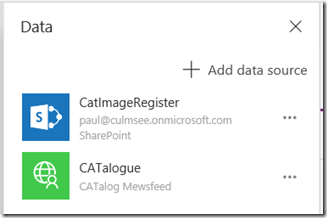
Next, let’s get the image control to display the photo itself. To do this, we will connect to SharePoint using the native PowerApps connector. From the View menu, choose Data Sources and add a SharePoint data source. Choose the SharePoint list that holds a link to your photos (in my case, CatImageRegister).
Data
Now set the Image property of the Image control to something like this: LookUp(CatImageRegister,Title=ThisItem.Title).CatImage. Although things look ugly, you should see the photos…

App feed
So what we did here was utilise the PowerApps Lookup function which returns first record in a data source that satisfies a formula. In my case I wanted to bring back the record where the Title field in CatImageRegister matched the Title field for each row in the feed gallery. From here, I specified that I specifically wanted the CatImage property and voila!
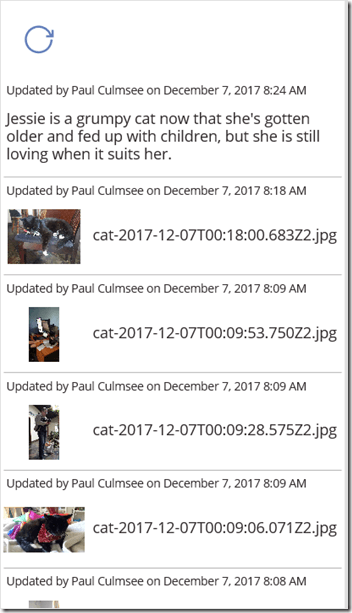
Next, we make the feed look less sucky by making the position of the Title/Description label more dynamic. If an image is displayed, we will reposition the Title/Description label to the right of the image. To do this, set the X property of the Title/Description label to: If(CatPhoto.Visible,CatPhoto.X + CatPhoto.Width + 10,0). This tells PowerApps to shift the label to the right of the image control when it is visible and sets the X position to 0 when its not.

App feed
Now let’s set the Y position. In this case, if the image control is visible, let’s vertically align the label to the middle of the image control. But if the image control is hidden, let’s set the label to positioned relative to the top label. To do this, set the Y property of the Title/Description label to: If(CatPhoto.Visible,(CatPhoto.Y + CatPhoto.Height) / 2,lbWhoWhen.Y + lbWhoWhen.Height + 10).
Nice… the feed is looking a lot tidier…

App feed
Now let’s fix the separator rectangle we created earlier. Here, if the image control is visible, the Yposition of the separator should be offset from it, however if the image control is hidden, then it should be based on the Title/Description label. To do this, set the Y property of the separator to: If(CatPhoto.Visible,CatPhoto.Y + CatPhoto.Height + 20, lbTitle.Y + lbTitle.Height + 20).
Preview the app and you should have yourself a nice feed!
App feed
Conclusion
At this point, I think we have covered enough to give you a really good feel for how PowerApps an play nicely with SharePoint search and Azure functions. While I fully accept this is an advanced scenario for the typical citizen developer, it is still a very low-code scenario and working knowledge of Azure functions and PowerApps/Flow custom connectors is very handy indeed.
I think it also shows that these platforms are highly flexible. This activity-feed scenario was one of those tricky scenarios that in the past, might have been added to the “too-hard” basket or resulted in custom development work.
Finally, I have recorded a series of videos to accompany these posts. I split the videos up into easy to consume chunks. The first one can be found below:
Thanks for reading.
Reference:
Culmsee, P (2018). How to make a PowerApps Activity Feed via SharePoint Search – Part 3. Available at: http://www.cleverworkarounds.com/2018/01/04/how-to-make-a-powerapps-activity-feed-via-sharepoint-search-part-3/ [Accessed 5 December 2018]


