In my previous blog I wrote about creating a virtual network in Microsoft Azure and a site-to-site VPN connection to connect your on-premises network to the virtual network in Azure. The next step is to create a Domain Controller and (optional) an Azure AD Connect server in Microsoft Azure.
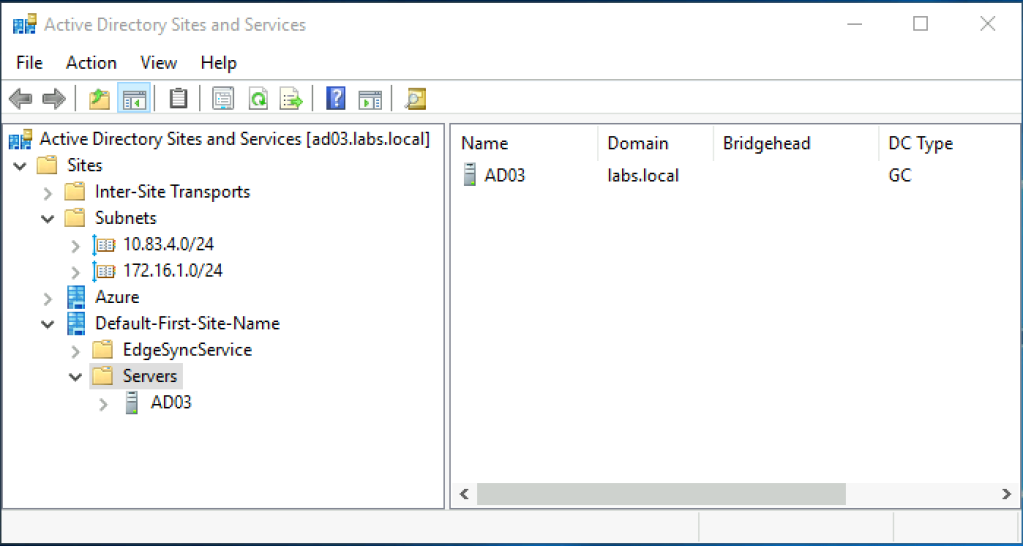
On a Domain Controller on-premises, create a new site in Active Directory and a new subnet and assign it to the new site. In my environment, the new site is called ‘Azure’ and the new subnet is ‘172.16.1.0/24’ as shown in the following screenshot:

Adding a new VM to Azure is not too difficult, but you must be careful with change the network properties. Do not change the DNS setting on the NIC inside the VM, but change it on the properties of the networking interface object in Azure.
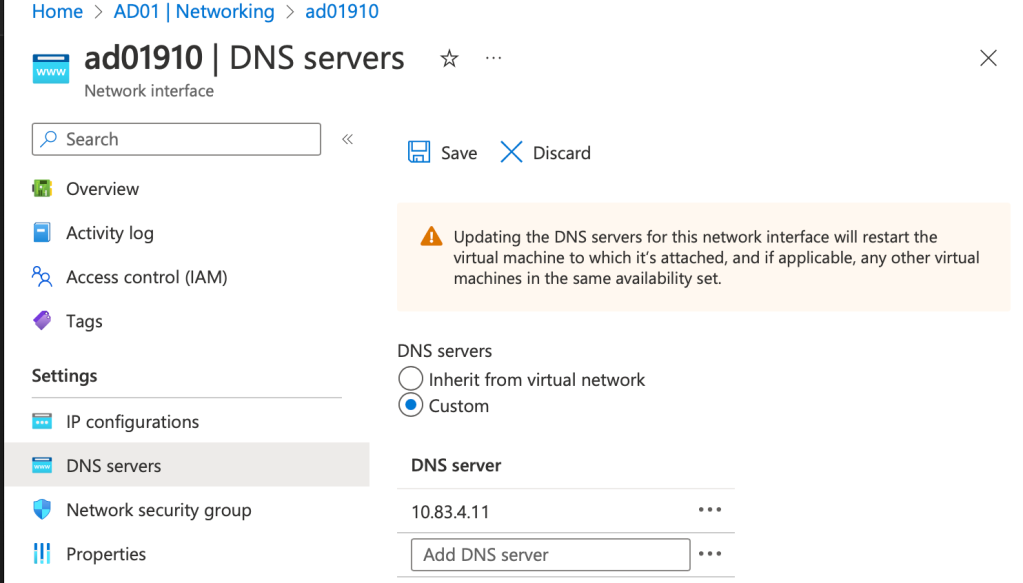
Open the properties of the Virtual Machine in Azure, scroll down to Networking (under Settings) and click on the Network Interface. Select DNS Servers (under Settings) and add the (AD Integrated) DNS server on-premises shown in the following screenshot:

It takes some time before the new settings are active. Once active, you should be able to resolve other machines on the on-premises network and more important, join the new VM to Active Directory. And once joined, install the ADDS components on the new VM and promote it to a new Domain Controller, running in Azure.
Enjoying this blog post? Find more here.
Another thing I have changed in Azure is the DNS setting of the virtual network. Open the virtual network properties and scroll down to DNS Servers (again under settings). Open the DNS servers properties, select the ‘custom’ radio button and add the IP address of the new Domain Controller (with Integrated DNS of course). All VM’s on this virtual network now use the new Domain Controller for name resolution.
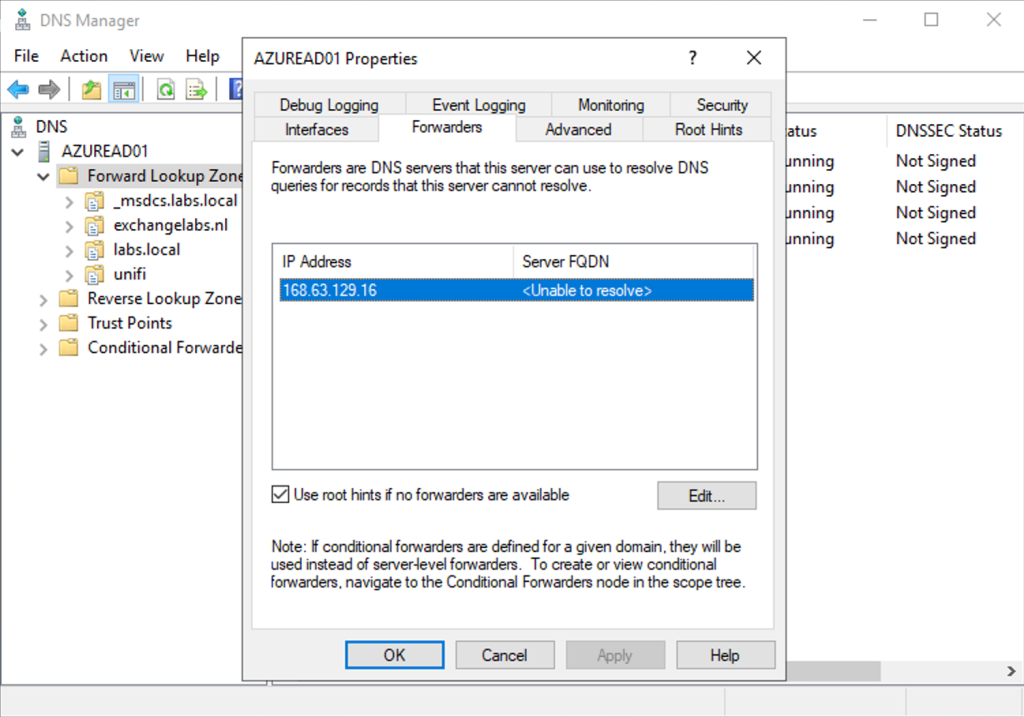
For external recurring DNS queries, and the Azure forwarder with IP address 168.63.129.16 on the forwarders tab of the DNS server as shown in the following screenshot:

The next step is to create a VM that will host the Azure AD Connect server. It still is my test environment so VMs don’t have to be that big, so for the Azure AD Connect server I’m using the Standard DS1 v2 (1 vcpu, 3.5 GiB memory) as well. You can also install Azure AD Connect on the Domain Controller in Azure, but personally I’m not a big fan of installing other services on Domain Controllers.
Once installed, logon to the new server, join it to the domain and reboot again, just you would do with a server on-premises.
Since we are working post migration to Exchange Online we do have an Azure AD Connect server running on-premises. Moving this server to Azure is just like upgrading an Azure AD Connect server. Export the configuration of the existing server to a JSON file, and import this JSON file using the Azure AD Connect setup application. I have blogged about this process in an earlier upgrade blog: https://jaapwesselius.com/2021/12/24/upgrade-azure-ad-connect-from-1-x-to-2-x/ but it’s similar to moving to Azure.
When using this method, the new server will automatically be in ‘staging mode’, so it will fill its database with information, but it won’t sync anything with Azure AD. When you are ready, set the old server in staging mode and get the new server out of staging mode. At this point you are synchronizing using Azure AD Connect in Azure instead of on-premises.
About the Author
My name is Jaap Wesselius and I’m working as an independent consultant in The Netherlands, focusing on Microsoft business productivity solutions with Microsoft Exchange server, Office 365, Skype for Business/Teams and identity management solutions.
Reference
Wesselius, J., 2023, EXCHANGE SERVER IN AZURE PART I, Jaapwesselius.com, Available at: https://jaapwesselius.com/2023/01/25/exchange-server-in-azure-part-i/ [Accessed on 3 July 2023]


 Using a SharePoint Online list as a Knowledge source via ACTIONS in Copilot AI Studio
