In this article, we shall see how to create a new workflow in Office 365 SharePoint.
By reading this article we can learn below points,
a) How to create new workflow for the Library
b) How to Apply the Created Workflow to the Libraries
c) How to assign the Task to Resource
d) Email Trigger Sample
Firstly let’s see how to create workflows in office 365 Sharepoint 2013 as shown below,
Before starting about new workflows, its also essential to know about WORKFLOWS and uses of it?
The Main purpose of Workflows in office 365 Sharepoint 2013 are as below
i) It will allow us to automate our business process.
ii) This business process can be as simple as document approval process with a single approver.
For Eg:
A Bank account opening process requires manager to review and approval our documents.If it is accepted by manager then document are ready for opening a account and notify team otherwise it will go to initiator to Update the document.
This process will be continued until the document is approved.
Now, let’s see How to create new workflow in office 365 online
Open your any site collection from your site as shown below,
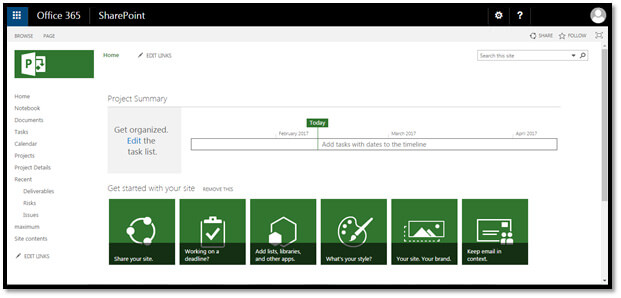
Open site collection from your site
Now in our demo, we shall consider Document library to create new workflow.
Click on Documents and then click on Library from above ribbon as shown below
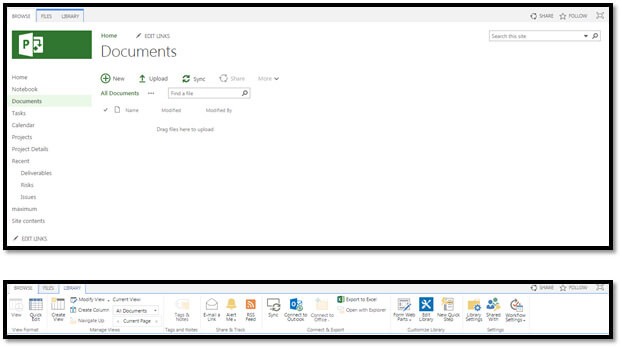
Click on Documents and then click on Library
Now click on Workflow settings as shown below and select Add a workflow option.
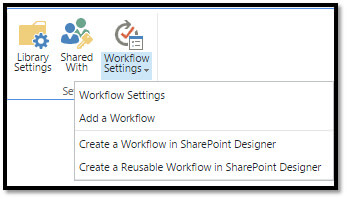
Workflow settings
Upon selecting Add workflow option, page navigates to below screen to create a new workflow
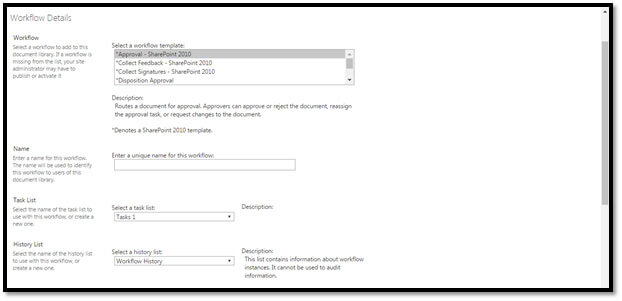
New workflow
Select a desired workflow template as per your need. In our demo, let us select Approval-Sharepoint2010.
Give a proper SharePoint workflow name, in my case it is “Document Approval”

SharePoint workflow name
Now, select Tasks (news) in Select a task dropdown as shown below

Select Tasks in Select a task dropdown
Select the work flow history, it means new workflow what we are creating will use new history list.
And select the checkboxes as shown in below and click next to proceed.

Work flow history
Up on clicking on next, we shall see Document approval page as shown below
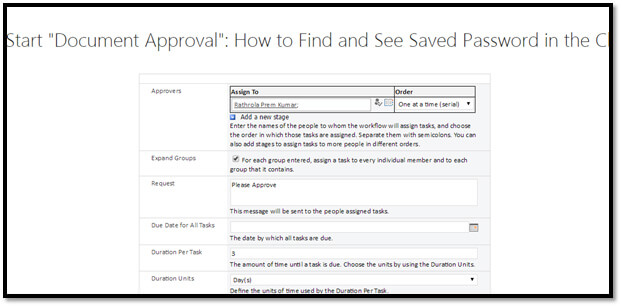
Document approval page
How to assign the Task to Resource
Assign to resource in the system, as shown below

Assign to resource
Type in custom request in the Request text box as shown below

Custom request in the Request text box
Upon your requirements, select the check boxes as shown below and click on save
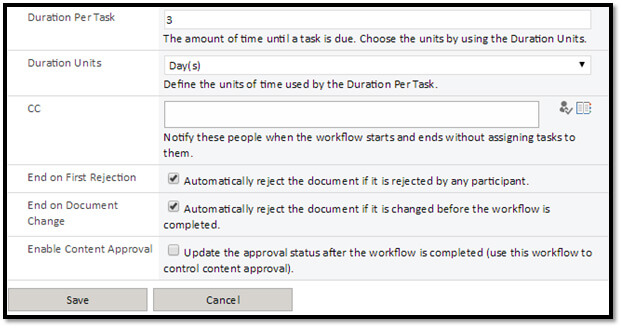
Select the check boxes as per your requirements
After clicking on save, page will navigate to settings page as shown below
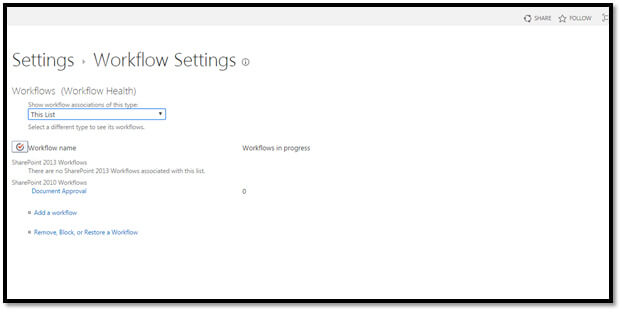
Settings page
Now open the document library, select any document and click on files ribbon as shown below
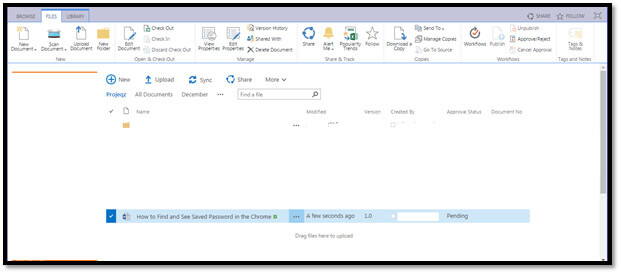
The document library
Click on workflows option as shown below

Workflows option
Note: Select a document to enable workflows option in above screenshot.
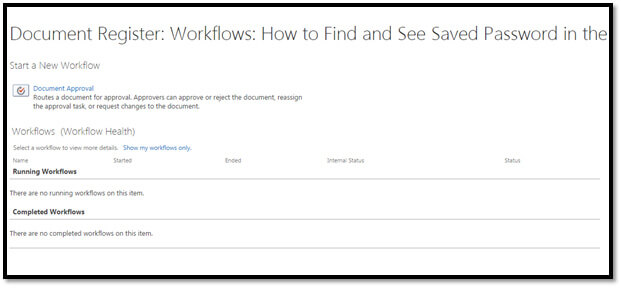
Once you done above task, then Document Register will be opened as shown below
Document Register
You can see our new workflow just created in above screenshot.
If you have more than one workflows, it will listed in the above screenshot.
Now click on the Document approval as shown below, up on click it will navigate to page where Workflow going to be start, if any changes required you can do it and click on start as shown below

Document approval
Once click on start, the work get instantiated and then goes back to document library as shown below
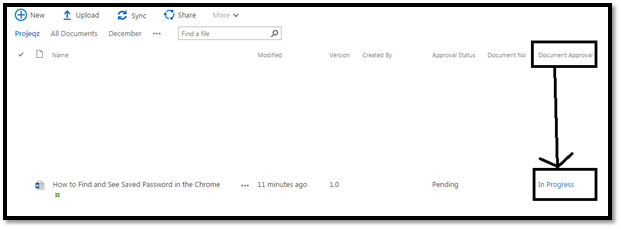
Document library
You can see the status of the work flow in above screenshot.
Email Trigger Sample
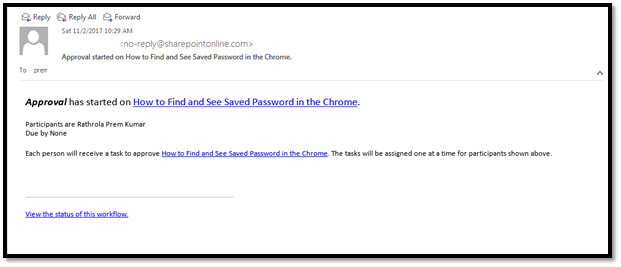
Email Trigger Sample
In our Next article will show How to approve the Workflow with workflow visualization.
Thanks for ready my article, always open for Questions & Suggestions are always welcome.
About the Author:
By nature I have a very curious and inquisitive mind. I like to do well into matters deeply and solve problems by using a lateral thinking approach coupled with strong analytical and evaluative skills, with the ability to articulate risk issues or concerns objectively. Besides these, I have an 5 years of exp. in IT Industry, Specially Software development and my area of interest is in SharePoint13,16,Office 365,MVC,C#,JavaScript,SQL,SSRS,Project Server etc.”
Achievements: C#MVP, Member of the Month (January)
Personal Blog: http://premkt.blogspot.my/
Linkedin: https://www.linkedin.com/in/rathrollapremkumar/
Would you like to become a full community member and have access to more great content such as eBooks, webinars, presentations and how to videos? Then simply click here to join the community.
It only takes a minute!


 Using a SharePoint Online list as a Knowledge source via ACTIONS in Copilot AI Studio
