In this blog article, we’ll explore the “Copy to” feature in SharePoint Online and how it can be used to copy documents across libraries. We’ll also look at why this feature is not available for SharePoint Online lists and what alternatives are available for copying list items.
It’s SharePoint week! 
The “Copy to” feature in SharePoint Online allows users to copy documents from one library to another (on the same site collection of different site collections) without the need to download and re-upload them. This can be a huge time-saver, especially when you have a large number of documents that need to be copied. The process is straightforward and can be done with just a few clicks.

To use the “Copy to” feature, simply navigate to the library where the document is located, select the document you want to copy, and click on the “Copy to” button. You’ll then be prompted to select the destination library where you want to copy the document. Once you’ve selected the destination library, click “Copy” to start the copying process.
While the “Copy to” feature is a handy tool for copying documents across libraries, it cannot be used to copy list items in SharePoint Online. This is because lists and libraries are fundamentally different in how they store data. Lists are structured in a way that doesn’t allow for the easy copying of items from one list to another.
However, there are other ways to copy list items in SharePoint Online. One option is to use the “Save as Template” feature after enabling custom scripting (Click here to read my blog post on how to do this), which allows you to save a list with its content as a template that can be used to create a new list with the same columns, data, and settings. This isn’t efficient when you have a large dataset

SO WHAT OTHER OPTION IS AVAILABLE?
A better way to copy large list data from one SharePoint list to another (on the same or different site collections) is to utilize Power automate
Steps:
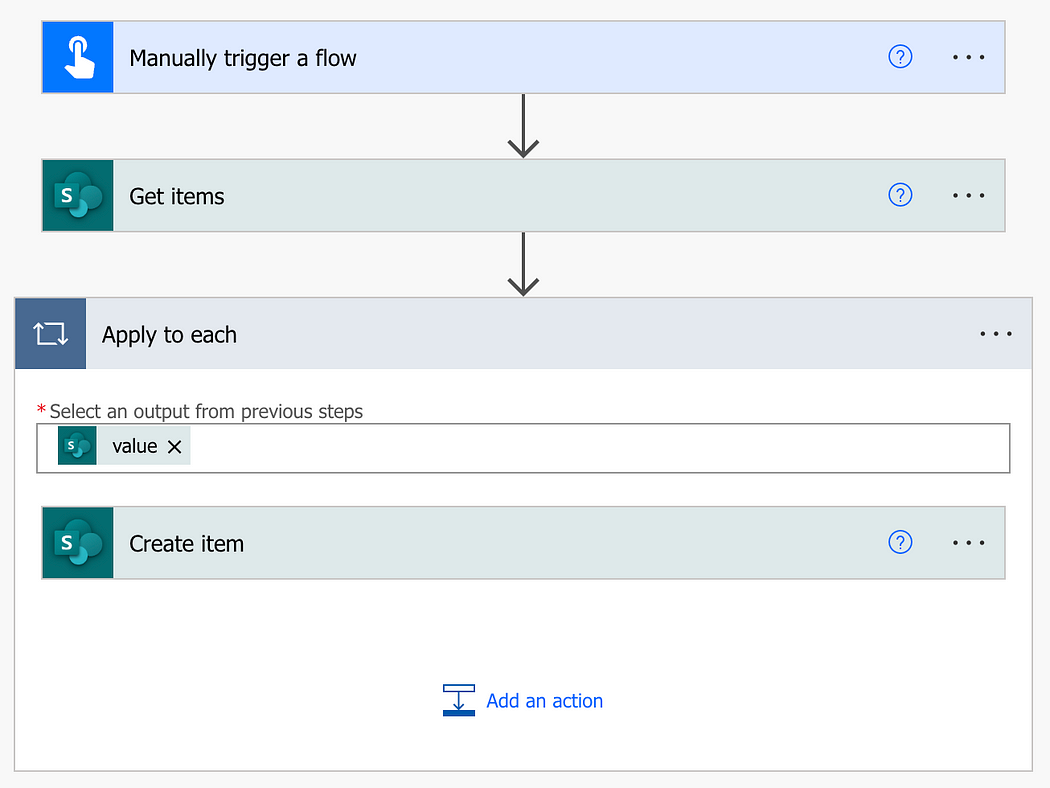
- Create a new flow: Log in to Power Automate and create a new flow. Select “Instant — from blank (Triggered manually as needed)” as the trigger for the flow.
- Add a trigger: In the trigger section, select “Manual” as the trigger. This means that the flow will only run when you manually trigger it.
- Add an action: Next, you’ll need to add an action to get the items from the first site. Select the “SharePoint — Get items” action and enter the details of the site and list where the items are located. You can also specify any filters or sorting that you want to apply to the items.
- Add a “Create item” action: Once you have the items from the first site, you can now create items on the second site. Select the “SharePoint — Create item” action and enter the details of the SharePoint site and list where you want to create the items. You can also map the fields from the “Get items” action to the fields in the “Create item” action to transfer the data. [When you map the fields it will create an “Apply to each” block]
- Save and test the flow: Save the flow and test it by manually triggering it. The flow should get the items from the first site and create corresponding items on the second site.

WAIT A MINUTE

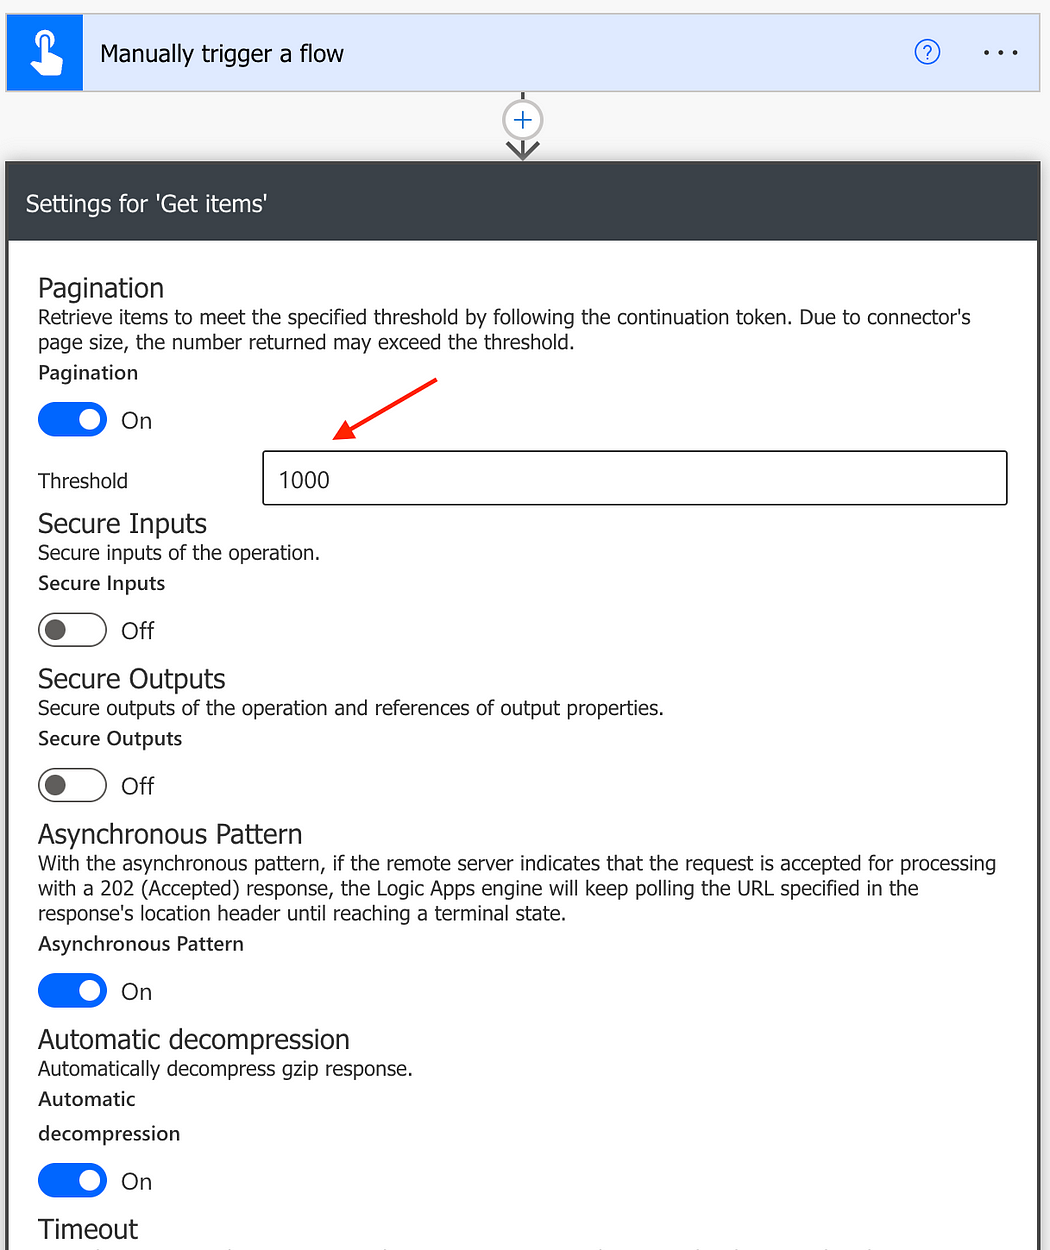
Your flow will successfully run. However, it will just copy over 100 items. This is because, by default, Power automate’s “Get Items” action card threshold will paginate the data and get you the first 100 items it finds. For example, if you have 800 items on the list, you can increase the pagination threshold by:
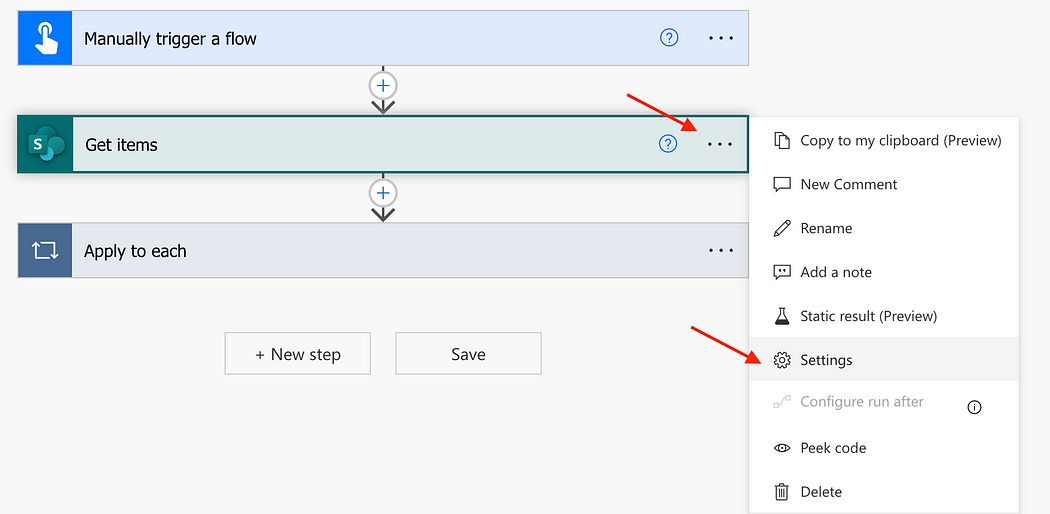
- Clicking on the ellipsis on Get Items
- Click Settings
- Turn on Pagination
- Type “1000” in the threshold field


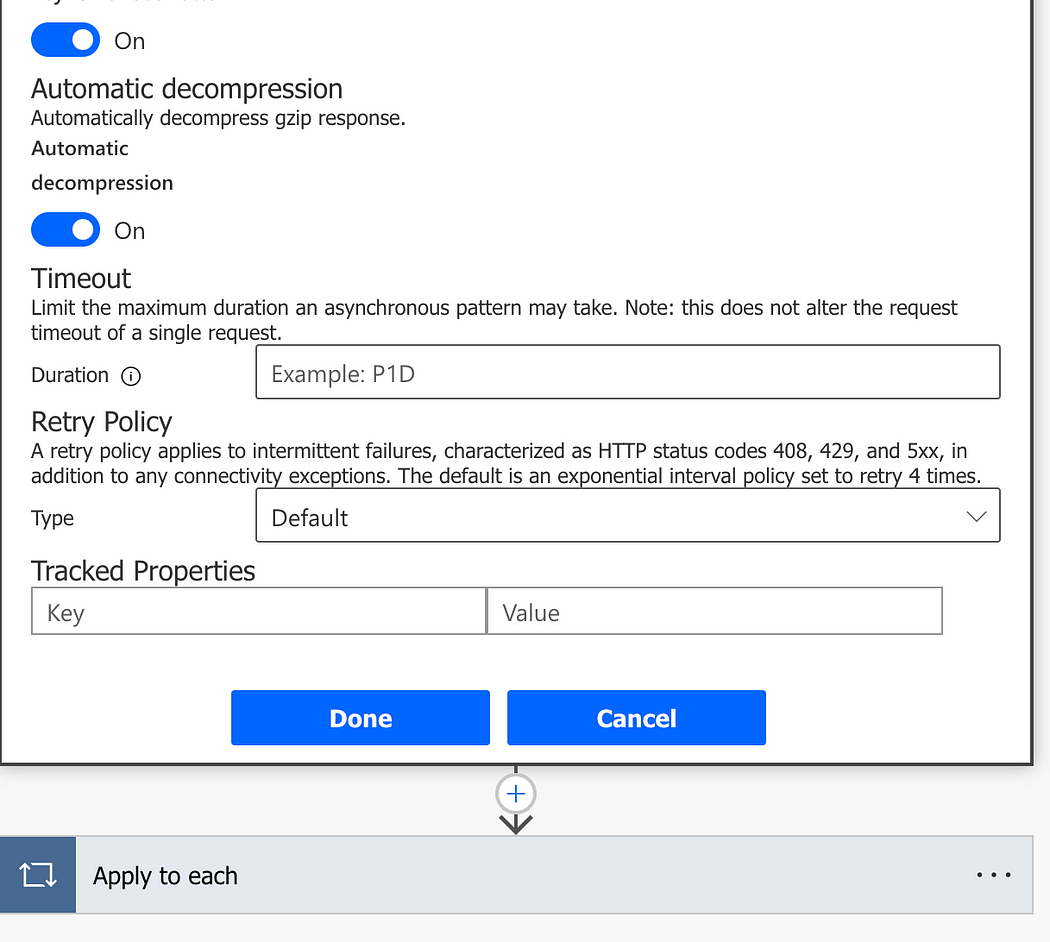
- Then click done

Now your workflow will copy over all your list items.
About the Author
SharePoint Developer | React JS | SPFX | SharePoint Administrator
Adegor, E., 2023, Copy Items from one SharePoint Online List To Another Using Power Automate, Medium, Available at: https://emmanueladegor.medium.com/copy-items-from-one-sharepoint-online-list-to-another-42630b146989 [Accessed on 5 May 2023]


