Introduction:
Azure Functions let you use Visual Studio to create local C# function projects and then easily publish this project to run in a scalable serverless environment in Azure. This helps us in analysing/publishing the results directly into Azure Data Explorer or Azure Blob Storage and App Insight Logs where we can create a workbook or do Monitoring based on the functions created.
Azure Functions:
Azure Functions support various triggers to execute your code in response to events. Below mentioned are the triggers in azure functions,
- HTTP trigger: Triggers your function via HTTP requests.
- Timer trigger: Executes your function at specified time intervals.
- Blob trigger: Responds to the creation or modification of a blob in Azure Storage.
- Queue trigger: Executes your function when a new message is added to an Azure Storage queue.
- Event Grid trigger: Listens for events published by Azure services or custom applications via Azure Event Grid.
- Service Bus trigger: Listens for messages on an Azure Service Bus queue or topic subscription.
- Cosmos DB trigger: Responds to changes in a Cosmos DB collection.
- Event Hub trigger: Processes events from an Azure Event Hub.
- GitHub webhook trigger: Responds to events from GitHub repositories.
- Twilio SMS trigger: Responds to incoming SMS messages via Twilio.
- SendGrid email trigger: Responds to incoming emails via SendGrid.
- Durable Functions: Provides patterns for long-running and stateful workflows, including orchestration and chaining of multiple function calls.
- SignalR Service trigger: Responds to messages sent through Azure SignalR Service.
- Azure Event Hubs trigger: Listens for events from Azure Event Hubs.
- Kafka trigger: Listens for events from Apache Kafka.
- RabbitMQ trigger: Listens for messages from RabbitMQ.
- Azure Monitor logs trigger: Executes in response to log events in Azure Monitor.
- Azure Key Vault trigger: Executes in response to changes in Azure Key Vault.
- GitHub Actions trigger: Executes in response to GitHub Actions events.
- Azure Storage Queue trigger: Listens for messages from Azure Storage queues.
- Azure Data Lake Storage trigger: Executes in response to changes in Azure Data Lake Storage.
- Azure SignalR Service trigger: Listens for messages from Azure SignalR Service.
- Azure Relay trigger: Executes in response to requests to Azure Relay endpoints.
- Microsoft Graph trigger: Responds to changes in Microsoft Graph resources.
Prerequisites:
- Visual Studio
- Azure Subscription
Here we are going see how we can create and execute the timer trigger function in azure functions app.
Create a Function App in Azure:
- Sign in to the Azure portal: Go to portal.azure.com and sign in with your Azure account credentials.
- Create a new Function App: Once logged in, click on the “Create a resource” button in the Azure portal’s top-left corner, then select “Compute” and choose “Function App” from the list of options. Alternatively, you can search for “Function App” in the Azure marketplace.
- Subscription: Choose the subscription you want to use.
- Resource Group: Either create a new resource group or select an existing one. A resource group is a logical container for Azure resources.
- Function App name: Enter a unique name for your Function App. This name will be part of the URL for your functions (e.g., myfunctionapp.azurewebsites.net).
- Publish: Choose either “Code” for deploying your function code directly or “Docker Container” if you want to deploy a Docker container containing your function app.
- Runtime stack: Select the programming language runtime you want to use (e.g., Node.js, Python, .NET, etc.).
- Region: Choose the Azure region where you want to host your Function App.
- Hosting options: Choose your preferred hosting plan. You can choose either a Consumption Plan, where you only pay for the resources consumed by your functions, or an App Service Plan, where you have more control over the underlying infrastructure but pay for reserved capacity.
- Monitoring: Optionally, enable Application Insights for monitoring and analytics of your Function App. This will help you gain insights into your function’s performance, usage, and errors.
- Review and create: Review the settings you’ve configured for your Function App, and then click the “Review + create” button.
- Create the Function App: After reviewing, click the “Create” button to create your Function App. Azure will now provision the necessary resources based on your configuration.
- Wait for deployment: Azure will take a few moments to create your Function App. You can track the deployment progress in the Azure portal.
- Access your Function App: Once the deployment is complete, navigate to your Function App in the Azure portal. From there, you can start creating and managing your functions.
- Create your first function: Inside your Function App, click on the “Functions” section and then click the “+ Add” button to create a new function. Follow the prompts to select a trigger, choose a development environment, and write your function code.
Create a Azure Function Project in Visual Studio:
- Use Visual Studio to create a C# class library project.
- Create a function for timer trigger.
- Run your code locally to verify function behaviour.
- Deploy your code project to Azure Functions.
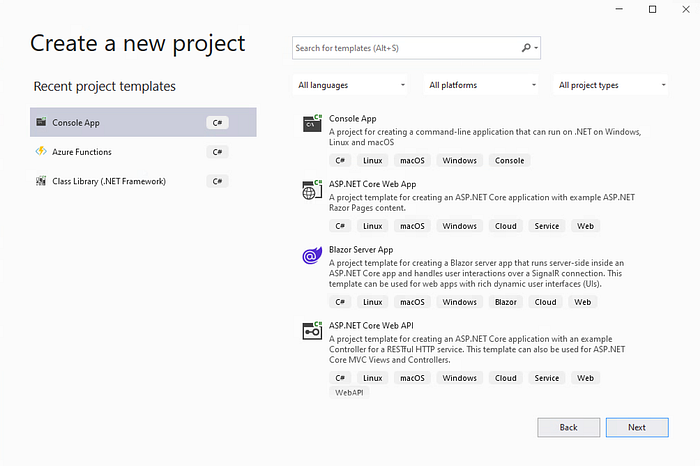
- Create a New Project: Click on “Create a new project” or go to File > New > Project in Visual Studio.

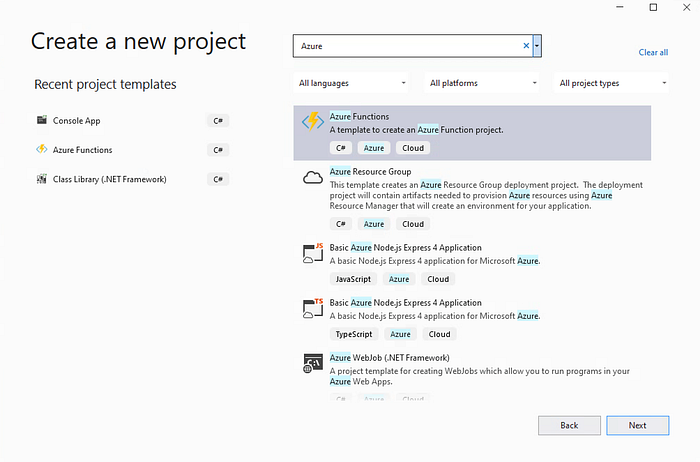
2. Select Azure Functions Project: In the “Create a new project” dialog, expand the “Cloud” node, select “Azure Functions”, and click “Next”.
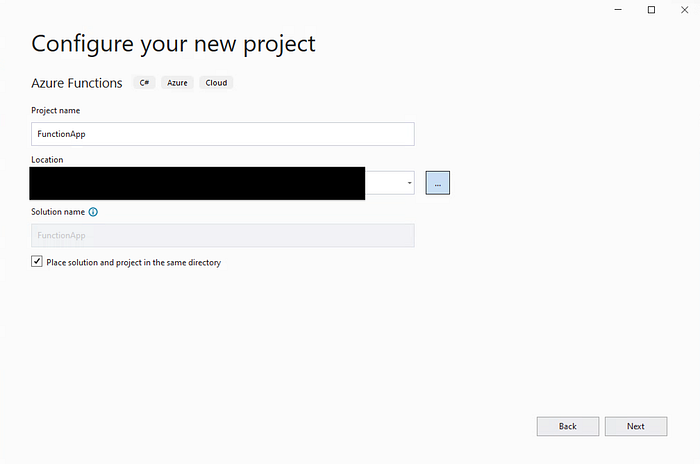
3. Configure Project Settings:
- Enter a name for your project.
- Choose a location to save your project files.
4. Choose Azure Functions Template: In the “Create a new Azure Functions application” dialog:
- Select “Timer trigger” as the template for your function.
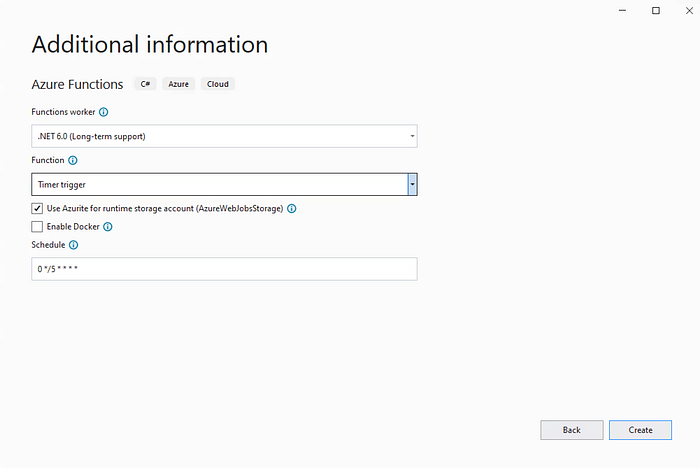
5. Configure Timer Trigger:
- Enter a name for your function.
- Set the schedule for the timer trigger in CRON expression format. For example, to trigger the function every 5 minutes, you can use 0 */5 * * * *.
- Click “Create” and the project will be created.
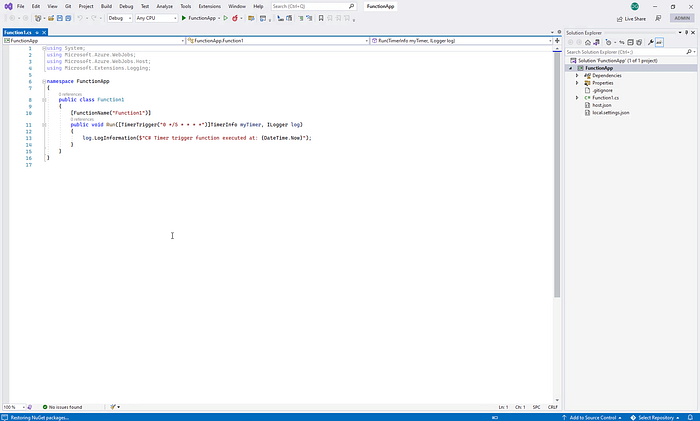
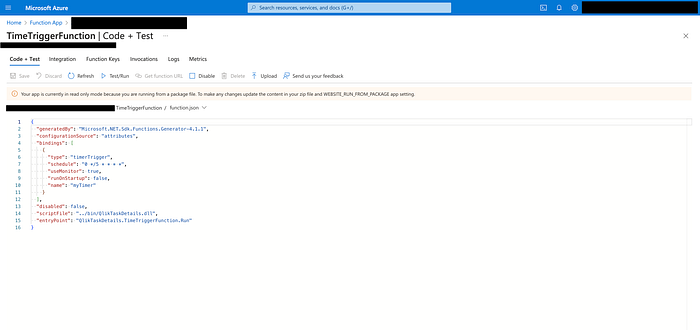
6. Write Function Code: Visual Studio will generate a template for your Timer Trigger function. You’ll find the function code in the Run method of the generated function class (Function1.cs by default). Write the logic you want your function to execute on the specified schedule.
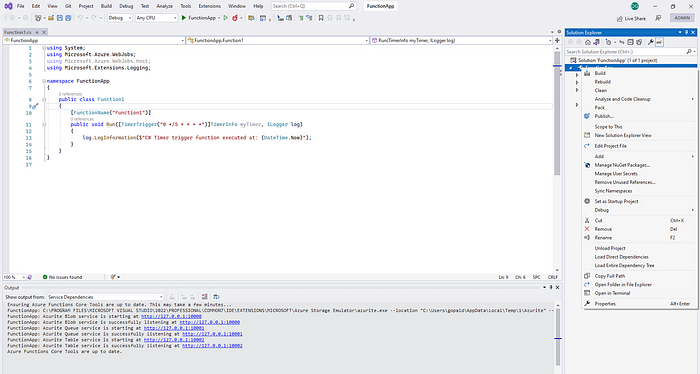
7. Build and Test the Function: Build your solution (Ctrl + Shift + B) to ensure there are no compilation errors. You can also run the function locally by pressing F5 to start the Azure Functions runtime locally.
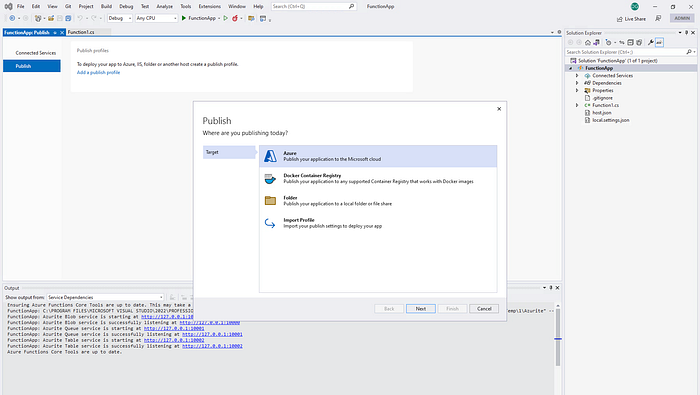
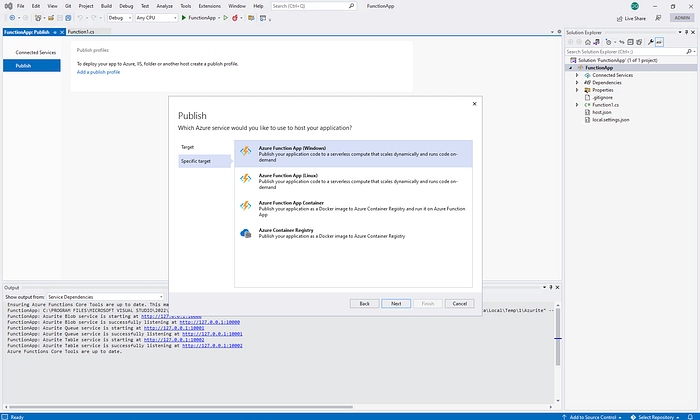
8. Publish the Function to Azure: Once your function is ready, you can publish it to Azure:
- Right-click on your project in Solution Explorer.
- Select “Publish” from the context menu.
- Follow the prompts to sign in to your Azure account, select or create an Azure Function App, and publish your function to Azure.
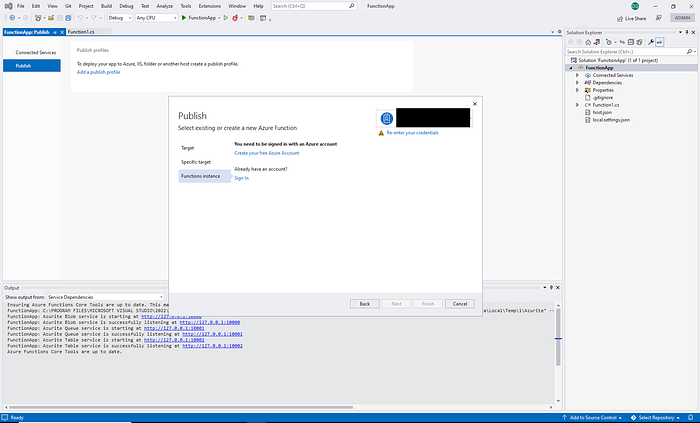
Sign-in to your Azure subscription to see the function app created
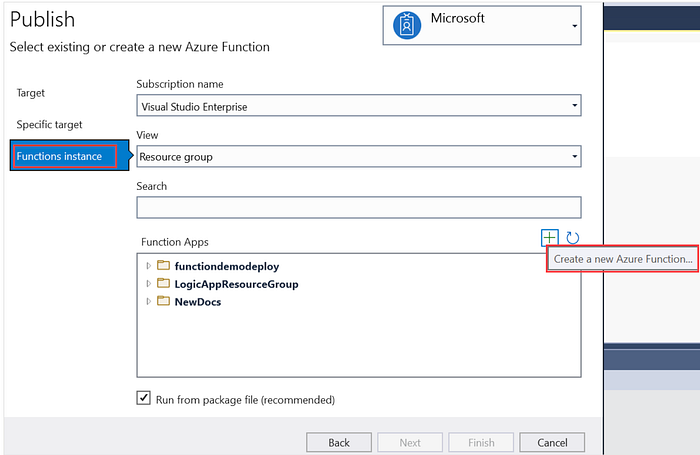
If you don’t have function app created you can create here
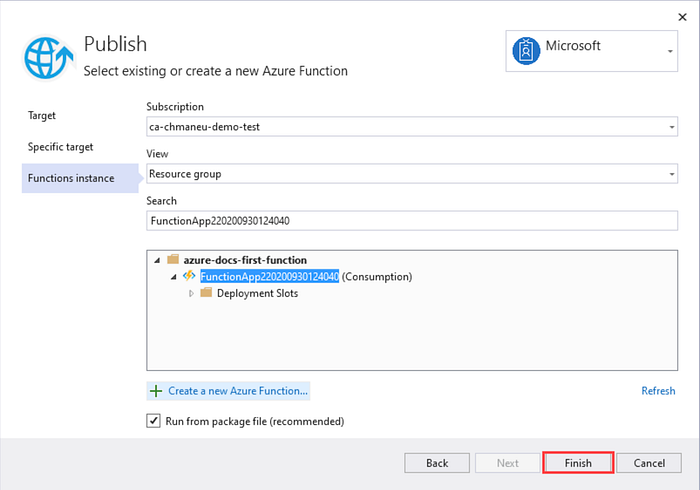
Select the function app in azure where you need to publish your code
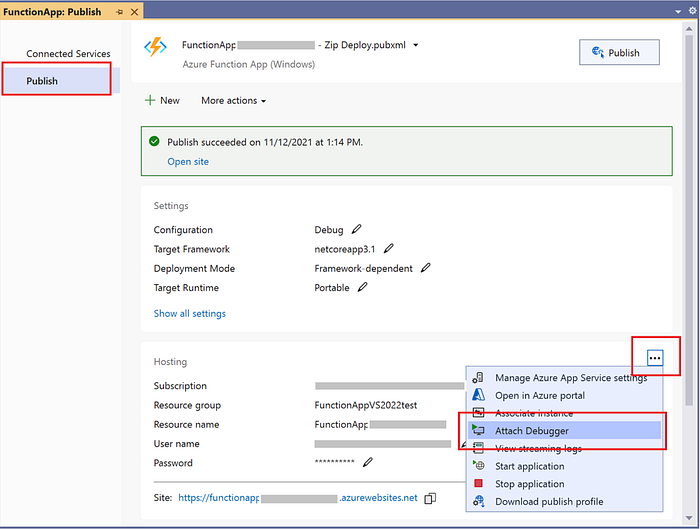
You will get succeeded message after the code is published to azure functions app.
9. Test the Function: In the Azure portal, you can test your function by clicking on its name to open the function editor. From there, you can trigger the function manually by clicking on the “Test/Run” button. You can also monitor the execution and view logs in real-time.

10 . Monitor the Function: Azure provides monitoring and logging capabilities for Function Apps. You can monitor the execution of your function, view performance metrics, and troubleshoot any errors using tools like Azure Application Insights or the Azure portal’s monitoring dashboard.
Conclusion:
With Visual Studio integration, creating and deploying Azure Functions becomes even more seamless, enabling developers to leverage familiar tools and workflows.
In this guide, we explored the process of creating and executing a timer trigger function in Azure Functions using Visual Studio. We covered the following steps:
- Introduction to Azure Functions and the various triggers supported.
- Prerequisites for creating and deploying Azure Functions.
- Creating a Function App in the Azure portal, configuring its settings, and deploying it.
- Creating an Azure Function project in Visual Studio, configuring a timer trigger function, writing code, and testing it locally.
- Publishing the function project to Azure from Visual Studio.
- Testing and monitoring the deployed function in the Azure portal.
By following these steps, anyone can quickly build and deploy Azure Functions to automate tasks, process events, and integrate with other Azure services or external systems. Azure Functions offer scalability, cost-efficiency, and flexibility, making them suitable for a wide range of use cases in modern application development.
This blog is part of Microsoft Azure Week! Find more similar blogs on our Microsoft Azure Landing page here.
About the author:

Experienced Quality Analyst with a demonstrated history of working in the information technology and services industry. Skilled in Java, Android Development, Selenium, Database Management System (DBMS), and Web Services. Strong quality assurance professional with a Bachelor of Engineering (B.E.) focused in Computer Science from Sri Shakthi Institute of Engineering and Technology.

G, D. (2024) Azure Functions App Guide — Create C# function in Azure using Visual Studio. Available at: Azure Functions App Guide — Create C# function in Azure using Visual Studio | by Dinesh | May, 2024 | Medium [Accessed on 24/06/2024]


 Using a SharePoint Online list as a Knowledge source via ACTIONS in Copilot AI Studio
