This short article shows you how to create tab look in SharePoint Custom Lists
When I went to http://www.w3schools.com/howto/howto_js_tabs.asp. I saw the tab I want but how am I going to put this in my Office 365 SharePoint.
- Create a SharePoint Custom List
- Open SharePoint Designer 2013 and point to the SharePoint site.
- Choose Lists and Libraries.
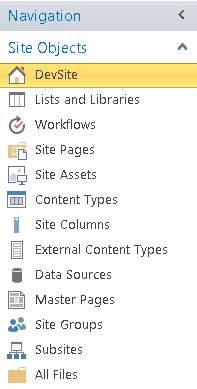
4. Choose a List, in my example is Tabblist.
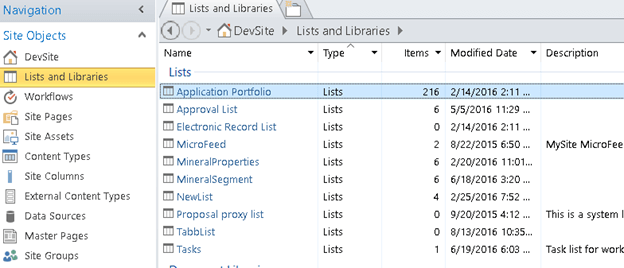
- Click New in Forms.
- Name the form, for example, NewFormCust.aspx. Check the Set as default form for the selcted type.
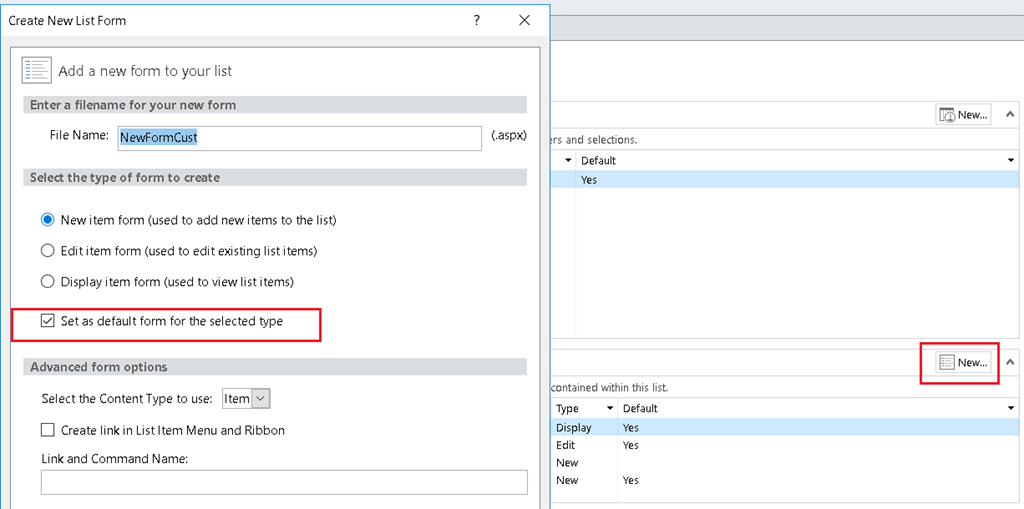
7. Click on the new form, NewFormCust.aspx, to edit.
![]()
9. Under the line
<asp:Content ContentPlaceHolderId=”PlaceHolderMain” runat=”server”>
add the JavaScript
https://someone.sharepoint.com/sites//sitecollection/subsite%20/b%20style=
The JavaScript as below.
function openCity(evt, cityName) {
// Declare all variables
    var i, tabcontent, tablinks;

// Get all elements with class=”tabcontent” and hide them
    tabcontent = document.getElementsByClassName(“tabcontent”);
for (i = 0; i < tabcontent.length; i++) {
tabcontent[i].style.display = “none”;
}

// Get all elements with class=”tablinks” and remove the class “active”
    tablinks = document.getElementsByClassName(“tablinks”);
for (i = 0; i < tablinks.length; i++) {
tablinks[i].className = tablinks[i].className.replace(” active”, “”);
}

// Show the current tab, and add an “active” class to the link that opened the tab
    document.getElementById(cityName).style.display = “block”;
evt.currentTarget.className += ” active”;
}
- Under the line
<SharePoint:CssRegistration Name=”forms.css” runat=”server”/>
Add the css
<SharePoint:CssRegistration Name=https://someone.sharepoint.com/sites/sitecollection/subsite/SiteAssets/tabcontent.cssrunat=”server”/>
The css code as below.
.tabcontent {
    -webkit-animation: fadeEffect 1s;
    animation: fadeEffect 1s; /* Fading effect takes 1 second */
}

@-webkit-keyframes fadeEffect {
    from {opacity: 0;}
    to {opacity: 1;}
}

@keyframes fadeEffect {
    from {opacity: 0;}
    to {opacity: 1;}
}
11. Look for
</tr>

      <tr>

            <td width=”190px” valign=”top” class=”ms-formlabel”>

            <H3 class=”ms-standardheader”>

            <nobr>Title<span class=”ms-formvalidation”> *</span></nobr>

            </H3>

       </td>

add the follow code before that.

<tr>

   <div>

    <ul class=”tab”>

        <li><a href=”#” class=”tablinks” onclick=”openCity(event, ‘London’)”>London</a></li>

        <li><a href=”#” class=”tablinks” onclick=”openCity(event, ‘Paris’)”>Paris</a></li>

        <li><a href=”#” class=”tablinks” onclick=”openCity(event, ‘Tokyo’)”>Tokyo</a></li>

    </ul>


    <div id=”London” class=”tabcontent”>

        <h3>London</h3>

        <p>London is the capital city of England.</p>

    </div>


    <div id=”Paris” class=”tabcontent”>

        <h3>Paris</h3>

        <p>Paris is the capital of France.</p>

    </div>


    <div id=”Tokyo” class=”tabcontent”>

        <h3>Tokyo</h3>

        <p>Tokyo is the capital of Japan.</p>

    </div>

</div>
When you create a new item now then you should see.
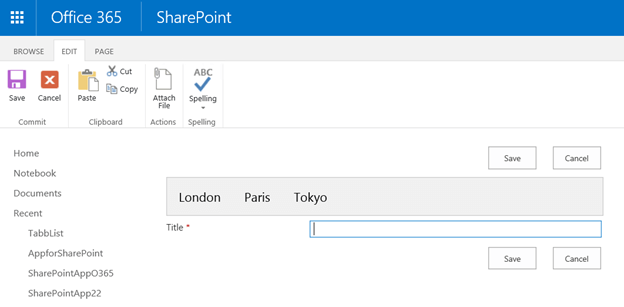
Create tab in Office 365 SharePoint List
Video: https://channel9.msdn.com/Blogs/MVP-Office-Dev/How-to-create-Tab-in-Office-365-SharePoint-Lists


